Category: DIY

science activities you can do at home, science crafts, scientist favorite recipes, science travel, fashion and beauty science, science art, mods

  • Using Rap Music to Help Students Learn Critical Science Topics!

    Using Rap Music to Help Students Learn Critical Science Topics!

    I don’t know about you, but I have always had a hard time learning science topics. Many of them are extremely abstract, and theoretical, and I always felt that the professor went so fast in class that I barely had time to keep up and ask questions. I would go home, feeling nervous and tense after class, and frantically search for a YouTube or Khan Academy video. However, when I started the video, I quickly found myself feeling disengaged, bored, and tired. I would spend hours on a video, just to find myself as confused as when I started watching the video. Initially, I thought it was just an issue with my understanding of that particular video, and I would try different videos on YouTube. Nevertheless, a point came when it just felt like every video was not working out, and that I was confused no matter what I did. I felt as if there was nothing I could do, and that I was just stuck not understanding the information and hoping for the best. Plus, with all my other classes, and all the tests I had plus my commitments outside of class, I felt extremely crunched for time and did not feel like I had the time to keep looking for resources. But something pushed me to try something new. I had heard of these parodies of songs that people used to learn complex topics before. Seeing that I was a big fan of rap music, I looked for rap music parodies. I was so pleasantly surprised by what I found! Suddenly, I actually felt engaged in what I was watching that I actually absorbed the information really effectively. This inspired me to try writing rap songs, myself, to teach science to kids and I decided to post rap lyrics, inspired my Migos that I have come up with so far to teach the processes of the circulatory system and how the heart pumps blood to kids. It goes as follows:

    Rhythm drop, heart stop

    Right A (atrium) pump blood to the V (ventricle) top

    Get that O2 from the lung, lung lung

    Come back down to the Left A, yeah

    We go from O nothing to something now

    The heart is really functioning wow

    Left V so strong, circulating

    Aortic valve kick starting and…

    Myocardium pumping and pushing,

    Valves open and blood flowing

    Valves close preventin the leaking

    We got normal function of heart (ay)

    Myocardium pumpin and pushin,

    Valves open and blood flowin

    Valves close preventin the leaking

    We got normal function of heart (ay)

    Looking back, I have two hypotheses about why students learn significantly better when listening to these raps than using conventional methods. For one, many people in the Gen Z generation are into rap music. They like the beat, melody, and the flow of the words. Therefore, when they listen to a rap song, even if it is about a science related topic, they are significantly more likely to be engaged and interested as they get hooked into the music and focus less on what the song is actually about. At least from experience, when you try to teach someone a topic in a way that they can relate to and something in their life, like a hobby or an interest that they can personally connect the topic to, they are much more likely to be motivated and interested in learning. My second hypothesis is that listening to rap music increases their interest in the topic, and many research papers have demonstrated that when people are more interested in something, they are likely to retain much more of the information that they learn about it. For instance, one study that looked into the quantity of information that students remembered and the durability of their memory, regarding that information when they learned it in a way that was interesting to them vs. using a conventional method produced some results that were extremely insightful and fascinating. For instance, “The researchers found that the students who were interested in what they learned gained way more because they were more likely to go to class, pay attention, and even wanted to take more courses in that given area”(Interest Matters: The Importance of Promoting Interest in Education). This makes sense, from my personal experience, as I looked forward to going to classes where I knew that I would be entertained and I would have fun, while I dreaded and would not look forward to going to classes where I knew that I would be bored and that I would not be engaged. Similarly, another study found that “Experiencing situational interest, like seeing a brush being used to paint in art class can greatly increase engagement”(Interest Matters: The Importance of Promoting Interest in Education). This is one of the principles that I use in the raps that I create, as I try to include applications of how these topics apply to real life in the lyrics to increase peoples’ attention. I have also experienced this personally, as I was more engaged in my Biomechanics class, when I saw how what I was learning could be applied to the motion of joints in real life. What I do not understand is that with so many studies pointing to this finding, why have we not implemented this learning model in high schools and colleges across the country? What are we waiting for? Why do we keep using old methods, when we know their success rates are limited? It is high time to stop going with the conventional, tried and true method, and have the courage to try something new. Not only will it make students and professors, alike, happier, but students will actually retain more knowledge that will help them in their future careers and, more importantly, their life! If you are a professor reading this, I sincerely hope you have the courage to give this a try in your class one day! I guarantee you that you will not regret it!

    Source:

    Harackiewicz, J. M., Smith, J. L., & Priniski, S. J. (2016). Interest Matters: The Importance of Promoting Interest in Education. Policy insights from the behavioral and brain sciences, 3(2), 220–227. https://doi.org/10.1177/2372732216655542

  • How to breathe FIRE! (Don’t Try This At Home!)

    How to breathe FIRE! (Don’t Try This At Home!)

    If you clicked on this link, you may be, like me, a bit of a pyromaniac. Unfortunately for us, playing with fire is quite dangerous, so…

    Disclaimer: The activity of breathing fire is extremely dangerous and should only be attempted under the strict supervision of a trained professional. The techniques and practices involved can result in serious injury or even death if not performed correctly. The information provided in this article is for educational purposes only and should not be used as a guide for attempting the activity. The author, Charged Magazine, and the Georgia Institute of Technology do not endorse or encourage the practice of breathing fire and assume no liability for any actions taken by readers as a result of this article.

    With all that out of the way, let’s talk about fire breathing. As awesome as it looks, fire breathing is undoubtedly dangerous. To lower the risk of injury, professional fire breathers use of fuels with a high flash point of at least 50° Celsius. In scientific terms, flash point is the lowest temperature that a substance will naturally evaporate into a flammable gas. One of the most popular fuels among professionals is paraffin oil, which is a highly purified lamp oil. Paraffin oil is ideal as it has a fairly high flash point of ~90° Celsius.

    One should absolutely avoid using any fuel with a lower flash point. Especially dangerous fuels include:

    • Ethanol – Ethanol can be absorbed into the bloodstream without ingestion, leading to unwanted intoxication (drunk + fire = bad!)
    • Methanol – Methanol can be absorbed into your body via a variety of methods, and can lead to blindness and neurological disorders. Fun fact, methanol is often a natural byproduct of alcohol distillation, and a lot of care is usually taken to make sure none of it gets into the final product. It’s also why distilling alcohol is so dangerous!
    • Fuels with very low flash points (e.g. butane, propane, etc.) – These fuels are prone to a build-up of flammable vapors in the oral cavity, which can combust inside your mouth (yikes!)
    • Common fuels (e.g. gasoline, kerosene, etc.) – Fuels like gasoline and kerosene often contain carcinogens and additives which can lead to health complications, and are much easier to ignite (which is bad.)

    Now that I’ve hopefully scared you into not trying this on your own, I’ll tell you about my preferred method of fire breathing. Unlike all of the examples outlined above, my favorite – instead, I like to use cornstarch. As crazy as it sounds, your typical supermarket cornstarch can be used to breathe fire! Although the flame isn’t quite as spectacular as a liquid-fuel flame, cornstarch is a (relatively) safe option as the powder doesn’t ignite unless it is suspended in air, so the flame has a hard time reaching your mouth after igniting.

    The process is super simple:

    Step 1: Safety. Make sure you are outside and away from anything flammable. Make sure it isn’t windy, as the wind can blow the fire back into your face (I’m speaking from experience here.) A fire extinguisher and a way to call 911 is a must. Water can be nice too (to rinse out your mouth.)

    Step 2: Put a spoonful of cornstarch in your mouth.

    Step 3: Light a lighter or torch.

    Step 4: Blow!

    If everything has gone to plan, congratulations! You are still alive, and your friends are probably mildly impressed with the small fireball that’s come out of your mouth.

    So there you have it! Have fun not trying this at home!

  • Behind the Baking: Leavening

    Behind the Baking: Leavening

    Introduction

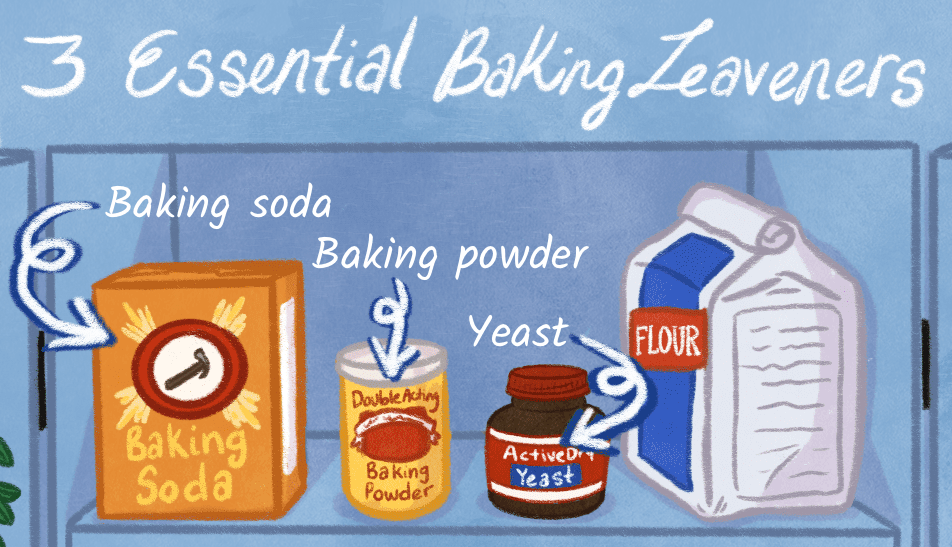
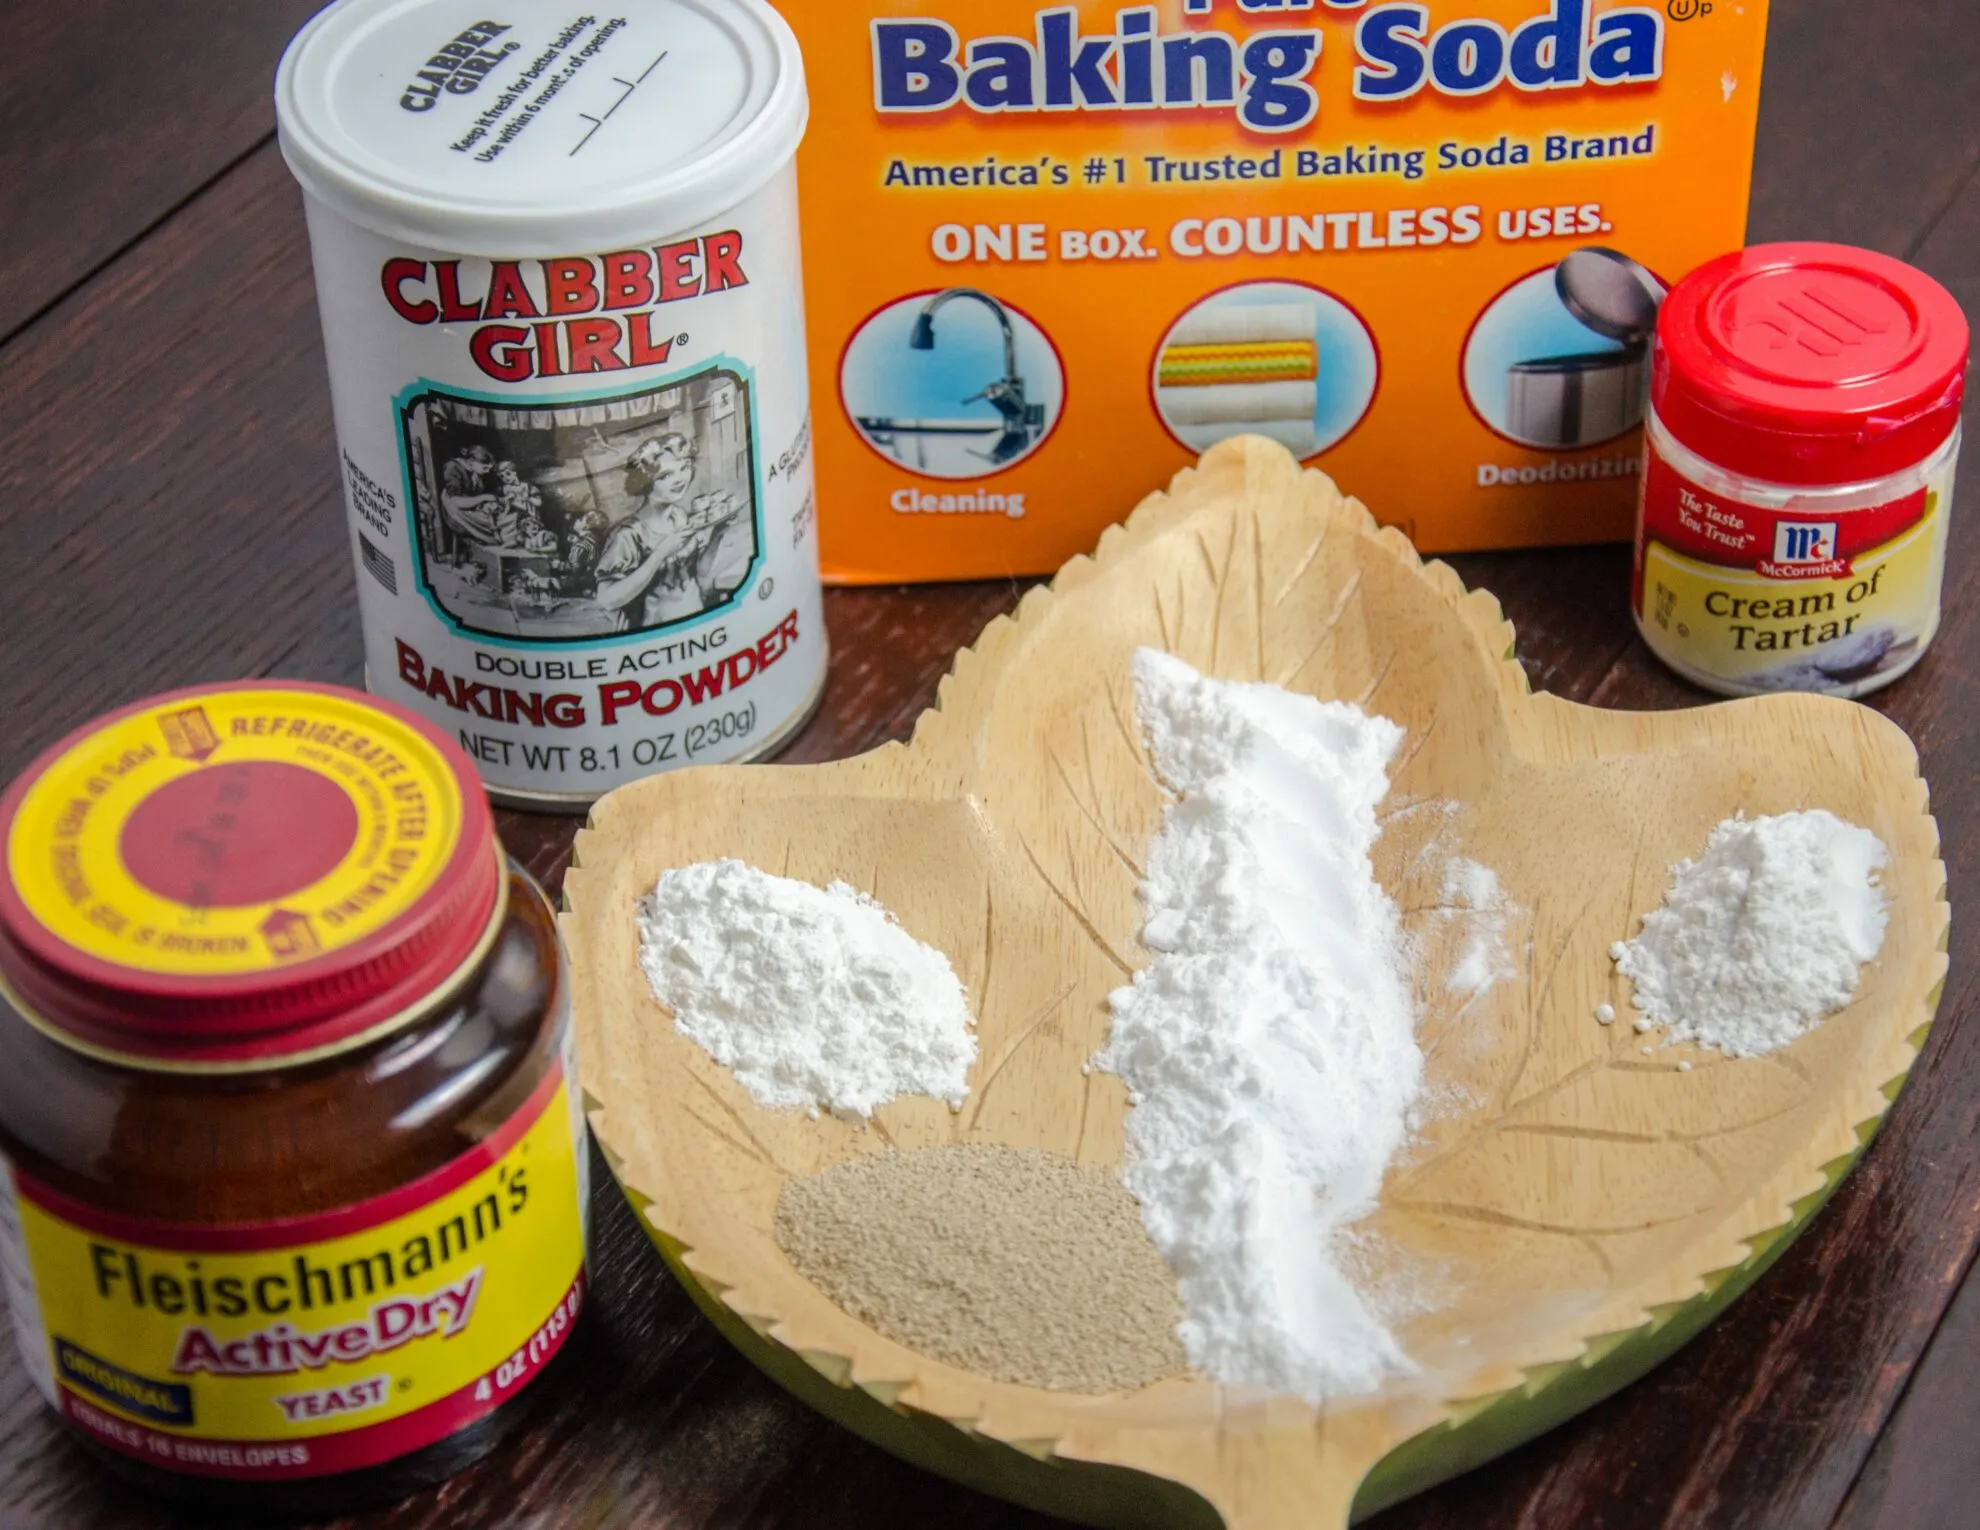
    Welcome to the second installment of my Baking Science series! This time, I’m putting a variety of leavening agents to the test to see how they perform based on taste, texture, and overall look. I will be baking three loaves of bread: one using yeast, one using baking soda, and one using baking powder. I predict that the loaves of bread will all vary greatly from each other, but I am especially interested in finding how the baking soda and baking powder bread differ since a majority of the general population cannot distinguish the two.

    What goes into baking beautiful bread?

    Most kinds of bread come together with only six ingredients: flour, oil, water/milk, a leavening agent, sugar, and salt.

    What’s a leavening agent and how does it work?

    The word ‘leavening’, as defined by Oxford Dictionary, is a substance used in dough or batter to make it rise, such as yeast or baking powder. Without this key ingredient, it would be impossible for the bread to rise, resulting in a flat cracker. In order to create a good ole’ sturdy loaf of bread, a couple of essential chemical reactions need to take place in the oven. The first ingredient, flour, contains two proteins called gliadin and glutenin; when combined with water, these proteins transform into gluten. The chemical makeup of gluten shows that the molecules are chained together to create long chains- this allows the bread dough to be elastic and stretchy. This is also why the longer the dough is kneaded, the more elastic it becomes. The dough’s stretchy quality is super important in achieving the end loaf because of the way the leavening agent works. The agent causes a bunch of tiny gas bubbles to form in the dough either before or while it is in the oven. Ever watched a baking competition and heard the cast talk about ‘proving’ their doughs? I know I have! The proving process involves letting your dough rest and rise before it is put in the oven to bake. This step is integral when using yeast, but not necessary for baking soda and powder since they do their work in the heat of the oven.

    Experiment

    Three loaves. Three agents. One winner. Just kidding, but I will include which bread I enjoyed the most at the end!

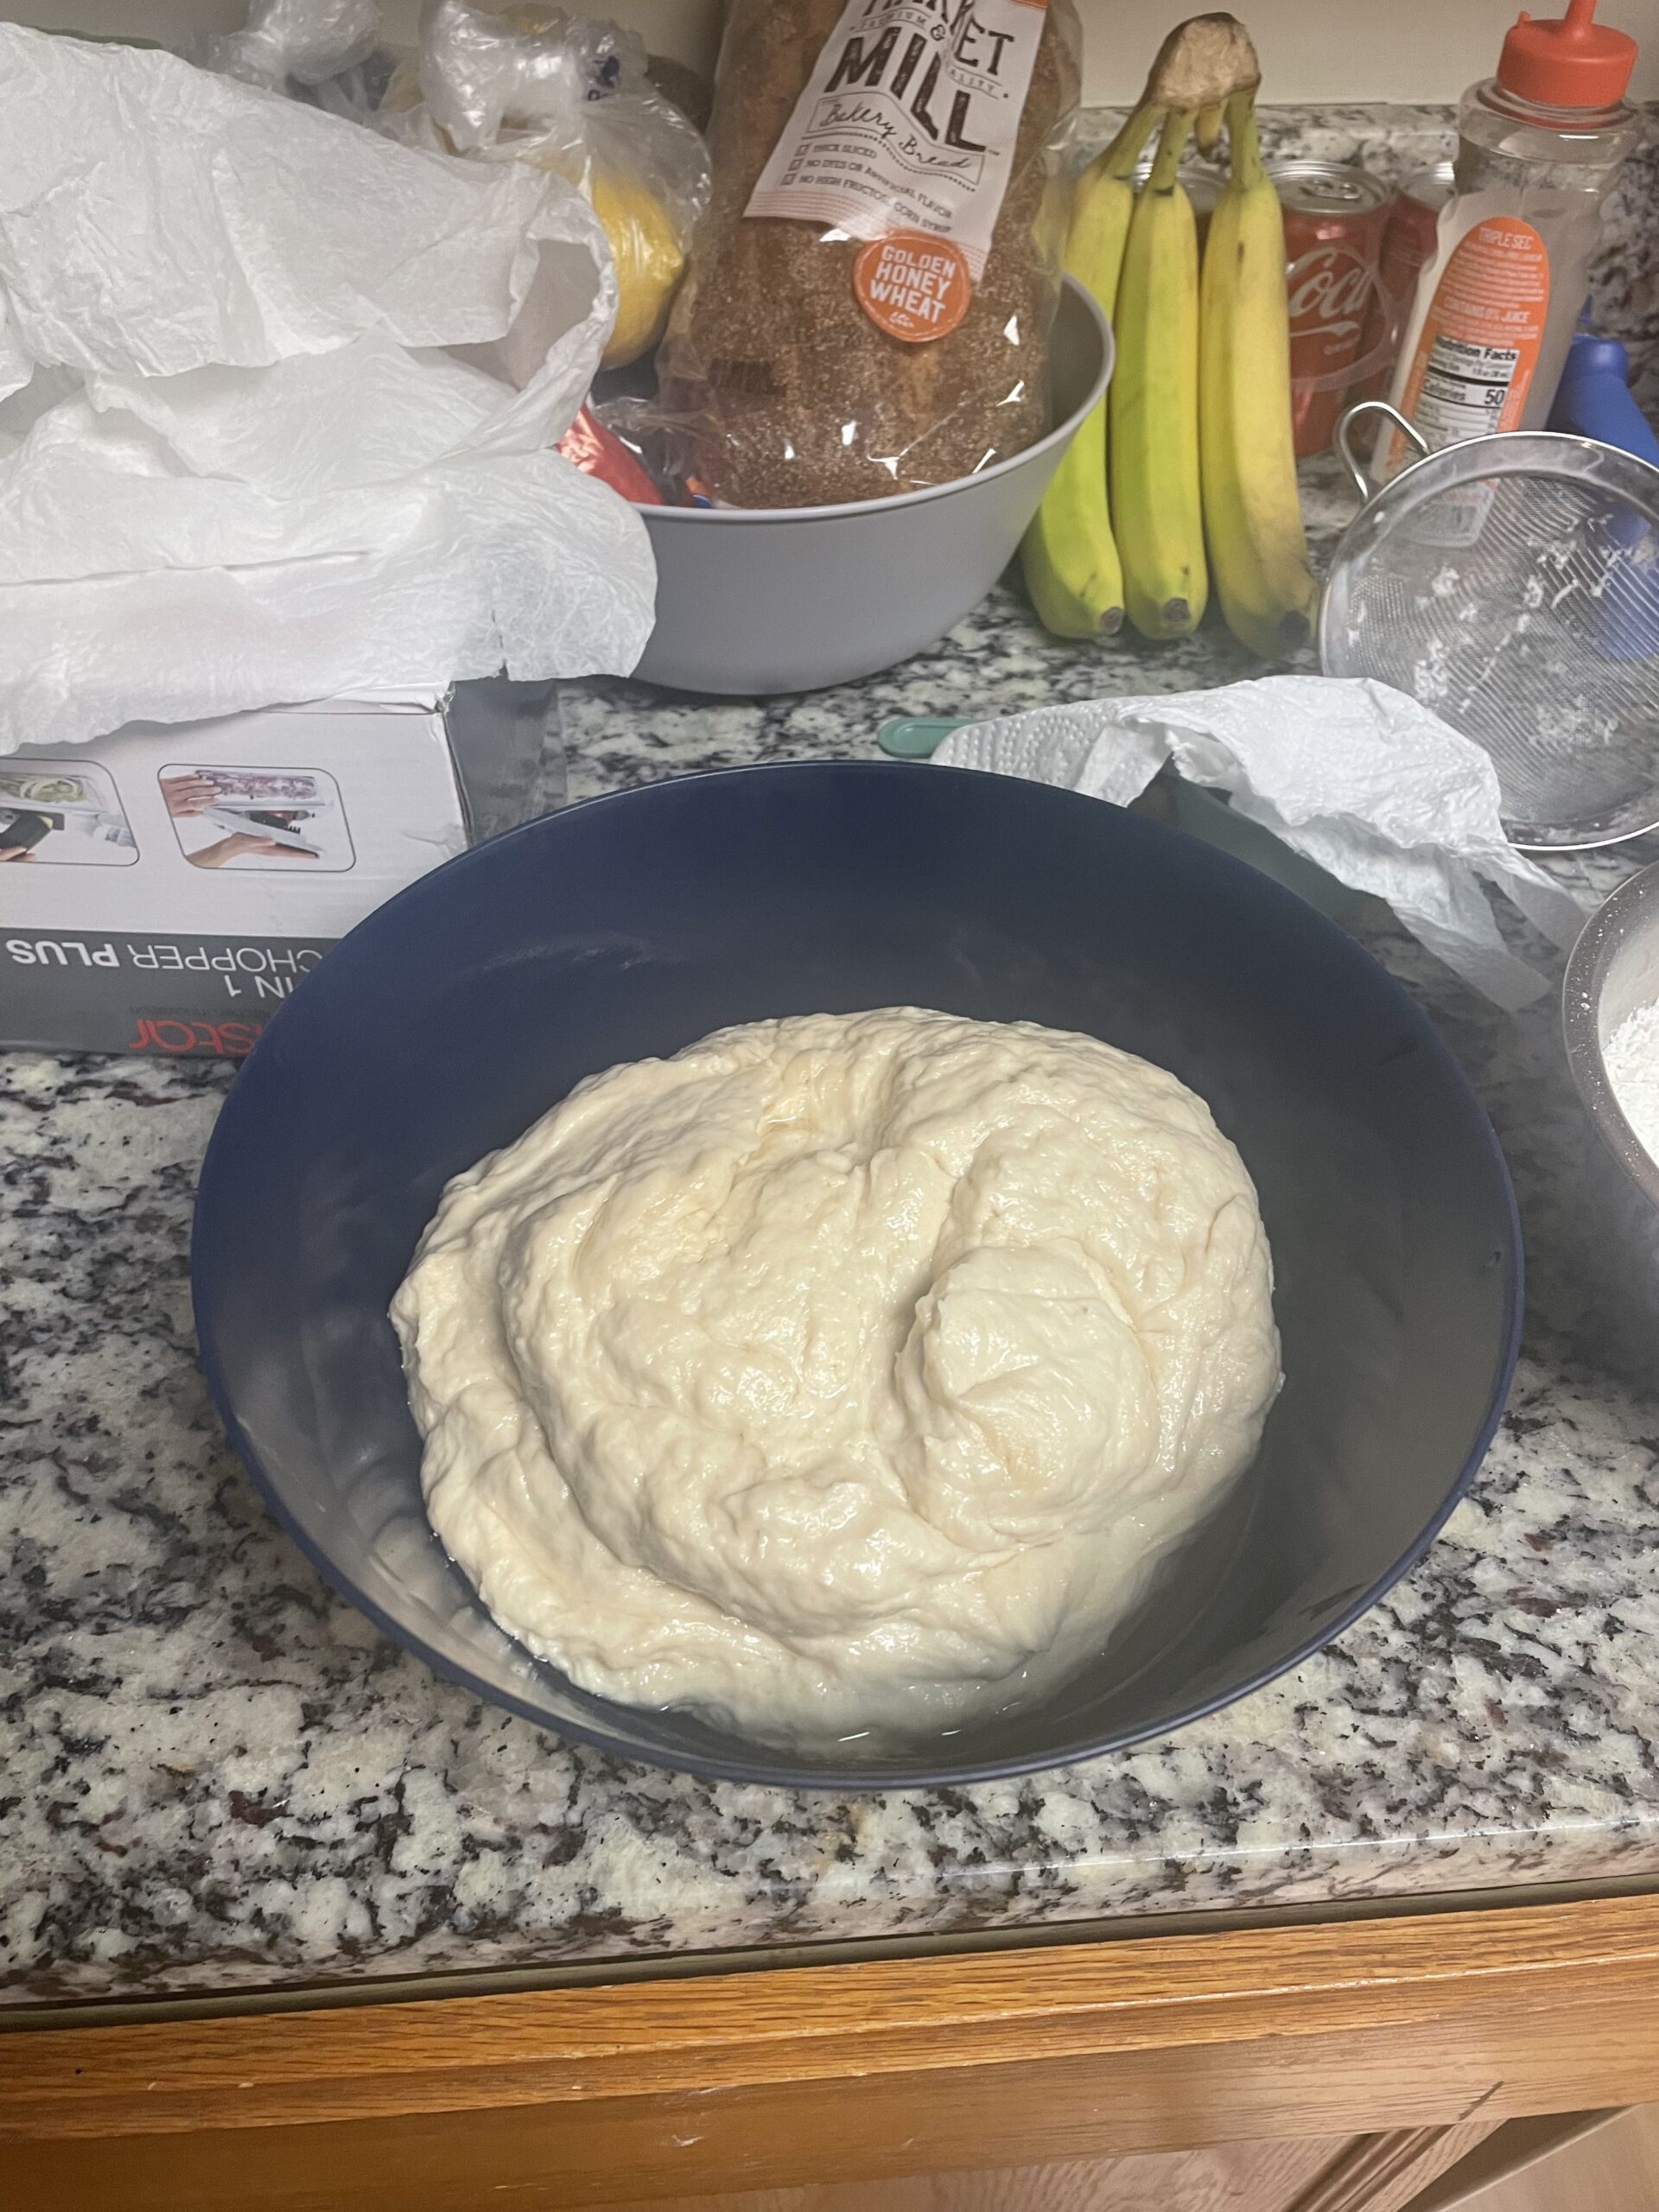
    Round 1: Yeast

    Recipe: https://butterwithasideofbread.com/homemade-bread/

    Round 2: Baking soda

    Recipe: https://sallysbakingaddiction.com/no-yeast-bread/

    Round 3: Baking powder

    Recipe: https://www.recipetineats.com/sandwich-bread-without-yeast-quick-easy/

    Observations and Opinions

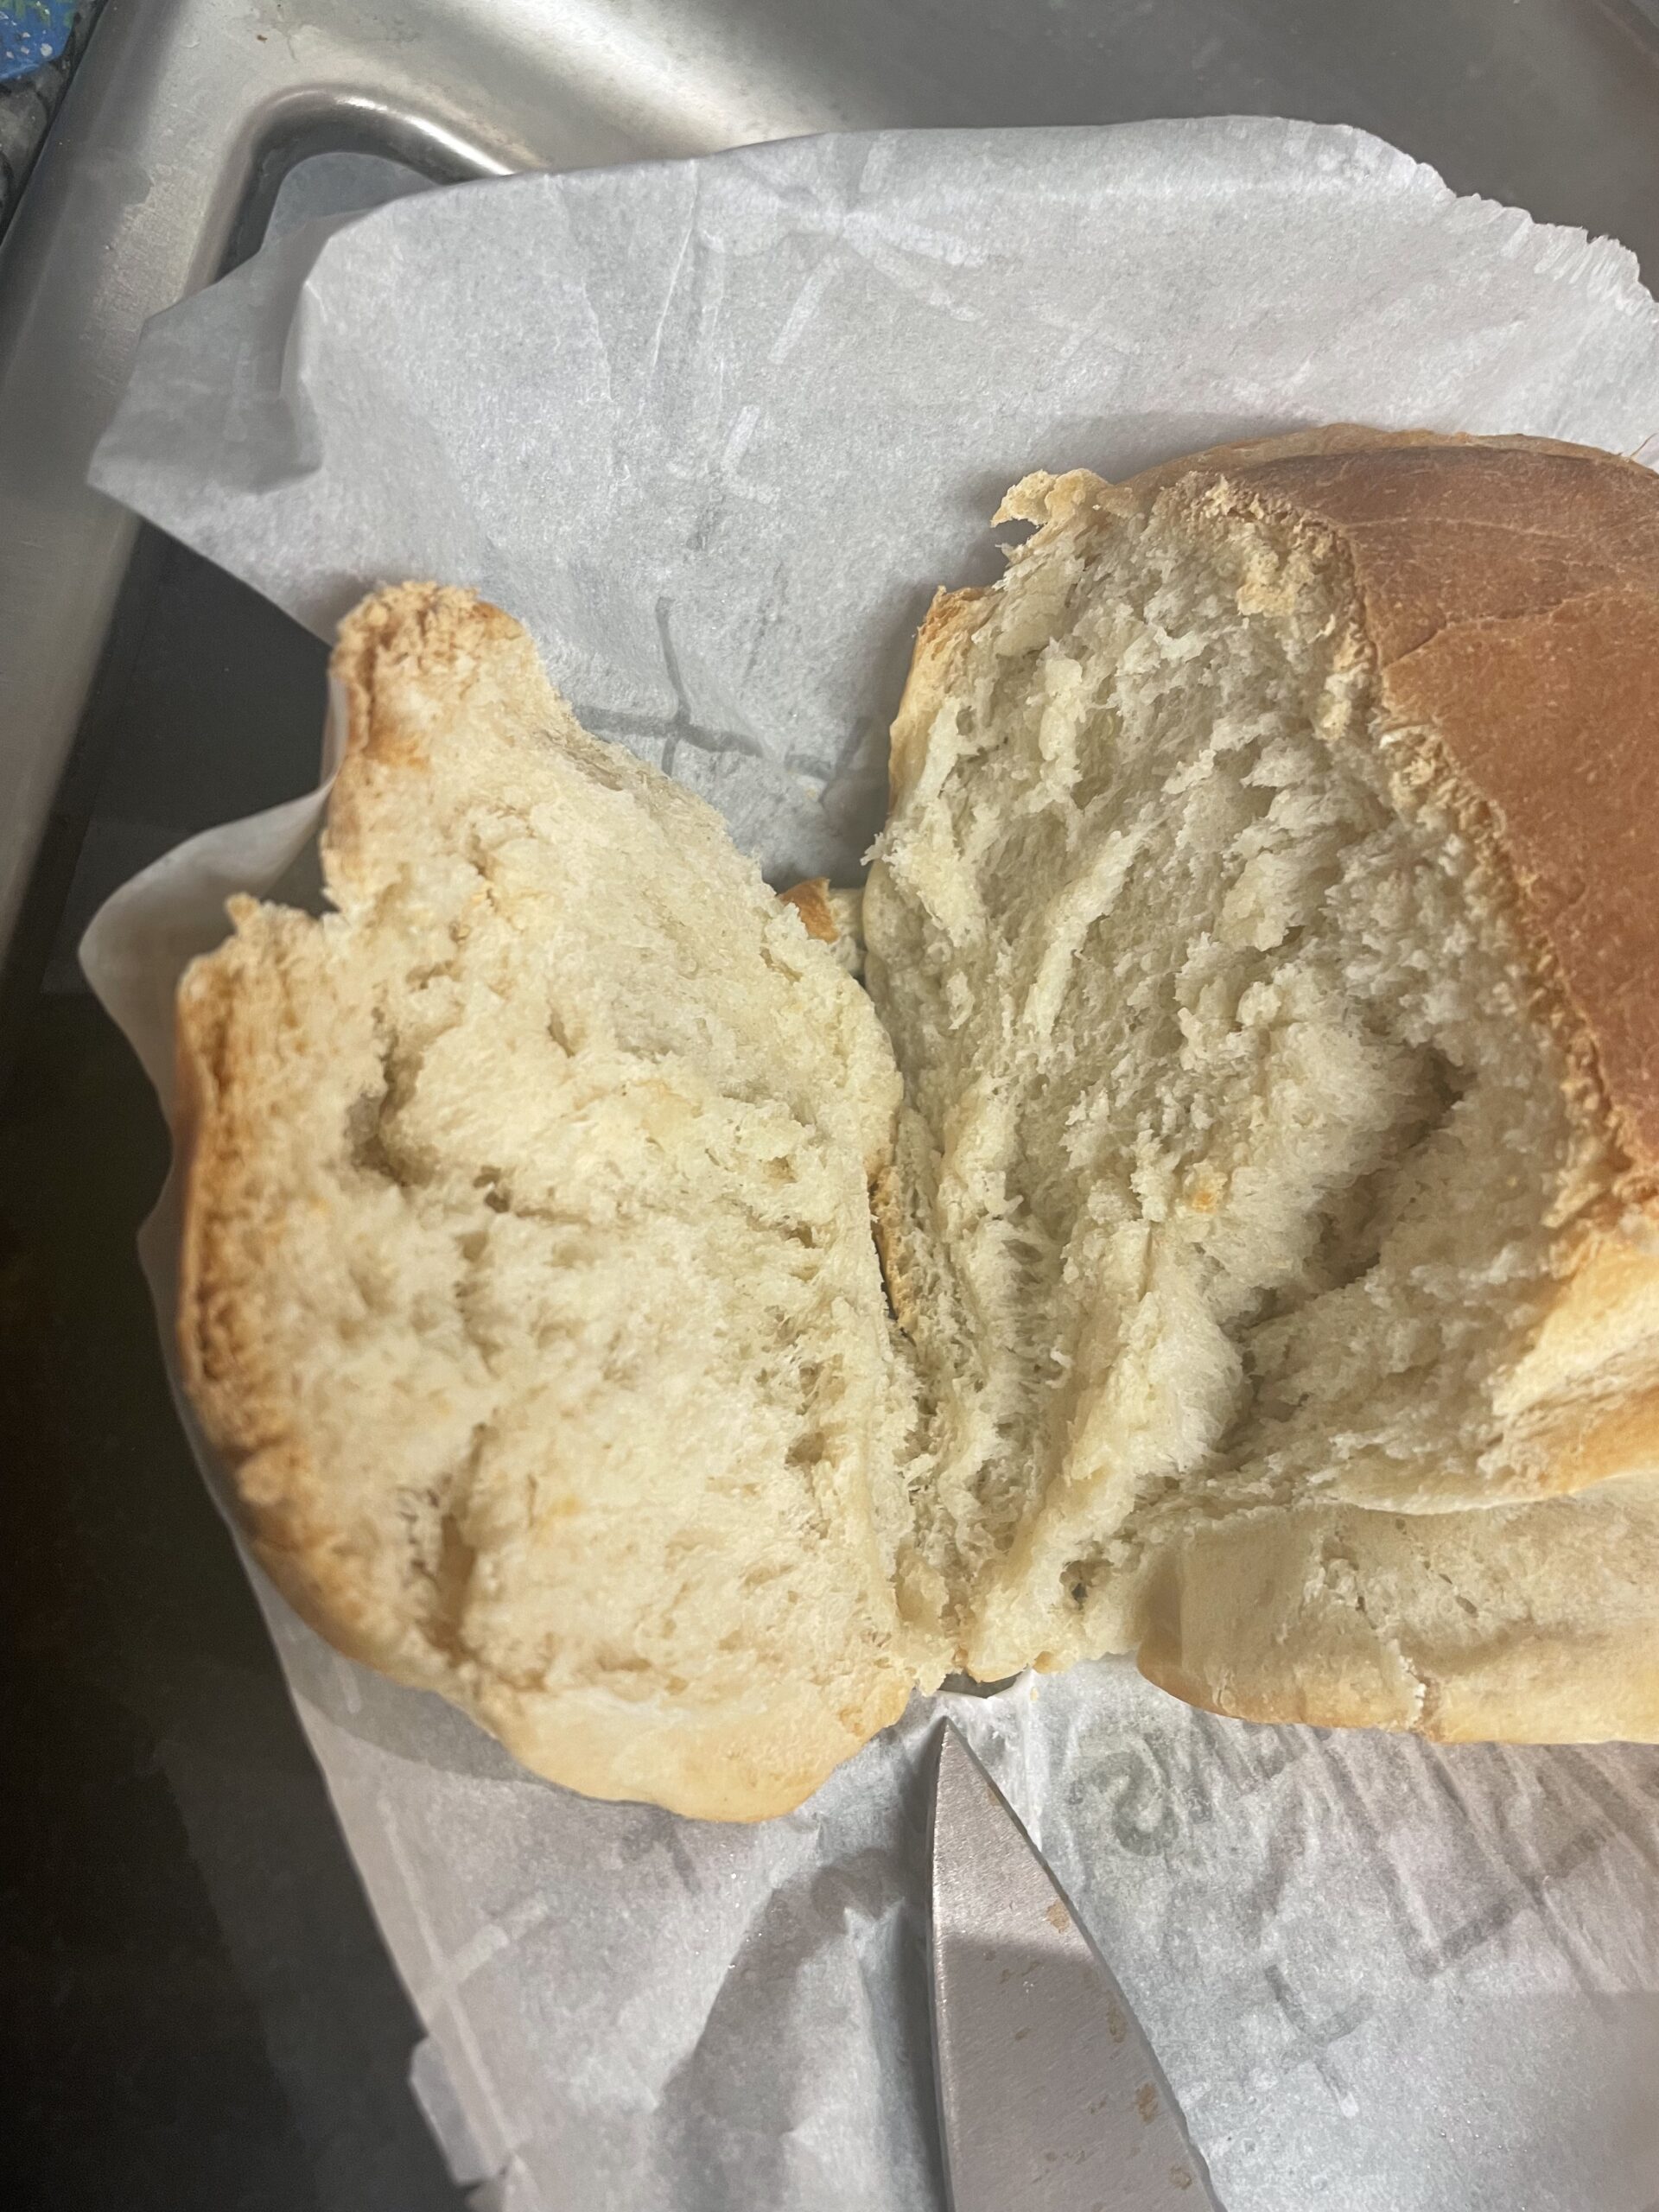
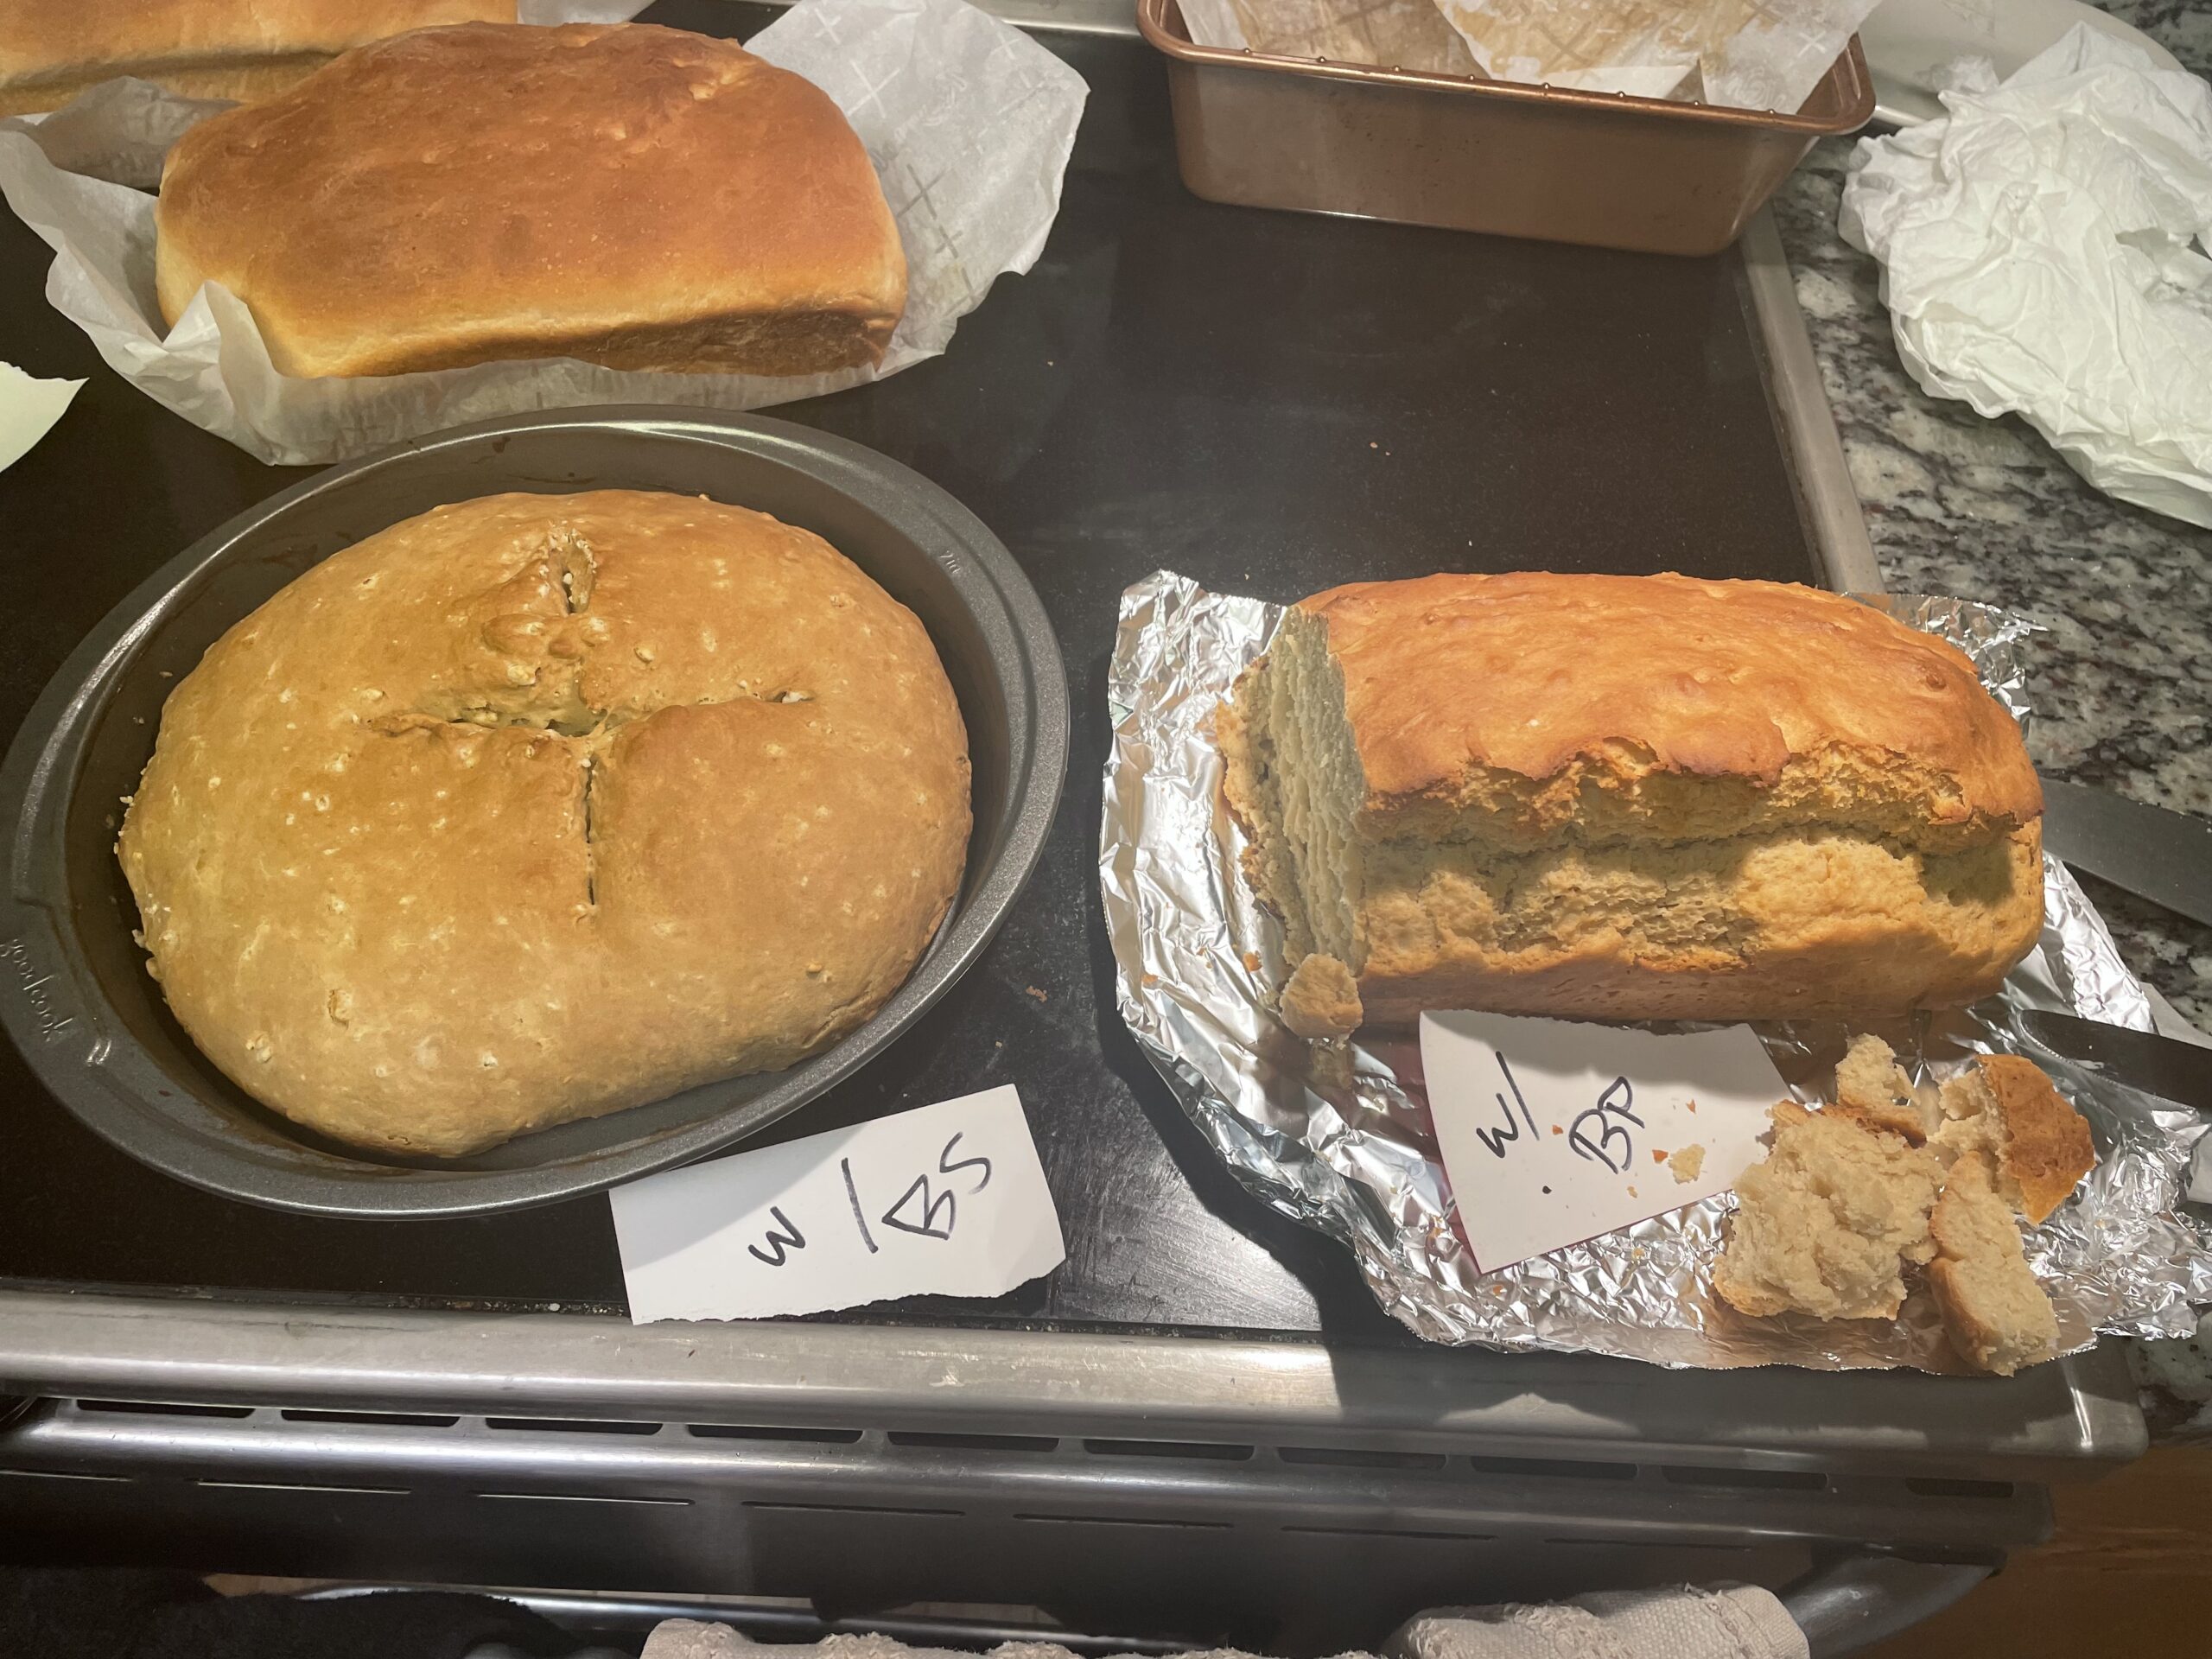
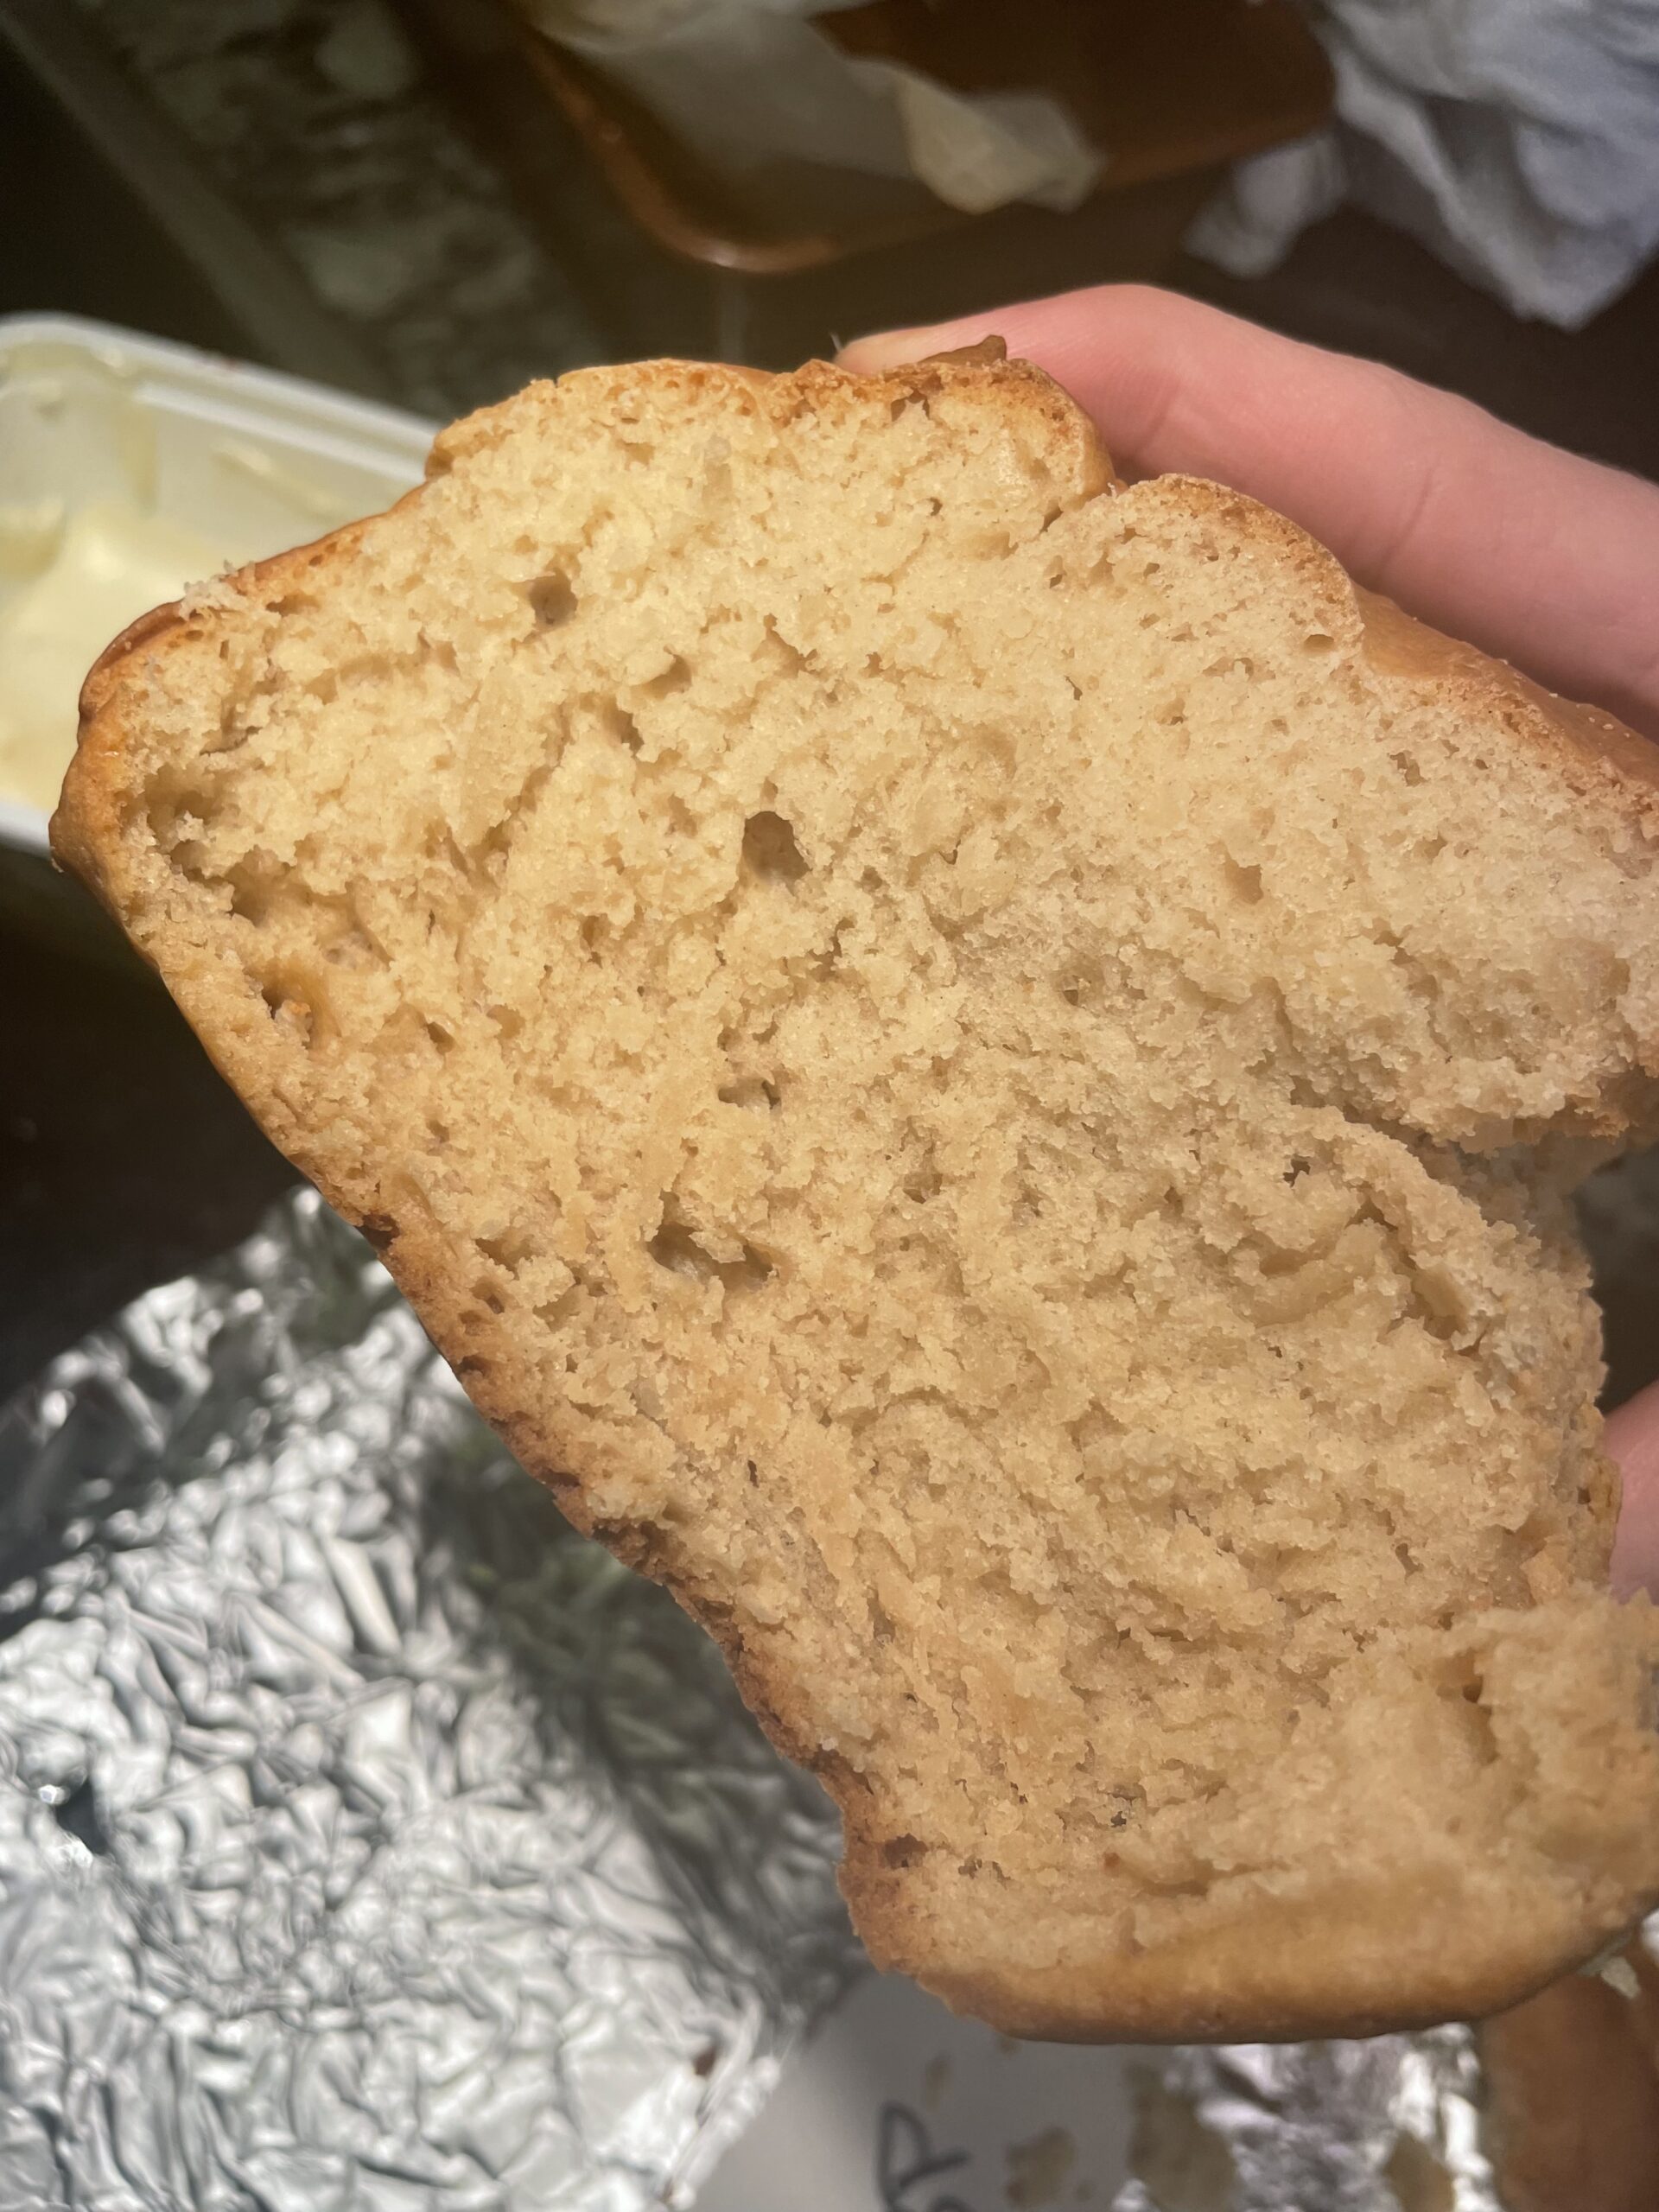
    Unsurprisingly, the bread that came out the best, in my opinion, was the yeast bread. This comes as no surprise because most of the breads that are sold in stores and that people generally think of are made with yeast. It’s hard to beat lightweight, airy feel of the yeast bread crumb. The baking soda bread was also delicious, but much much denser than the yeast bread. The baking powder bread was the weirdest- it was super heavy and stodgy and just not good. That might have been due to my error though, I may have overmixed it or kneaded it too much. The baking powder bread was so tough I didn’t want to cut a slice and eat it.

    Final Thoughts

    My favorite bread of the three was the yeast bread! The other breads honestly did not stand a chance against the tried and true yeast bread and I now know that I do not care for soda bread much. I would advise against making bread with baking powder, it was so hard for me to get it right but maybe some practice could improve it. Overall, it was super fun to test out these leavening agents and see them in their rising action.

  • LaTeX: A Typesetting Guide

    LaTeX: A Typesetting Guide

    As an aspiring scientist, I look to encourage as many people as possible to read what knowledge I can share. Technology has made that incredibly easy, as proven in history by the boon caused by the printing press. A huge proponent of sharing information is the accessibility to a wider audience, and part of that leads to a discussion on aesthetics and formatting. Even now, I’m aware of the way that each indent in this article will help make it easier for you, the reader.  In science, there is so much data and foundations to cover to be able to support all of these knowledgable ideas and to get to that quicker, the LaTeX Project has made it easier to streamline all of this together so that scientists can do what they do best – share their knowledge. Now, I hope at this point you’re aware that the LaTeX project has nothing to do with gloves commonly adorned by doctors, or the red suit that Velma (our new lesbian icon) wore in the Scooby-Doo live-action movie. If not, let me explain. From the site itself, “LaTeX… is a document preparation system for high-quality typesetting… often used for… technical or scientific documents,” (The LaTeX Project.org). During a semester where all but one of my professors strongly encourages submitting all work in LaTeX, and previous reports submitted under the guidelines of the American Physical Society, I felt it part of my duty to share some wisdom on the subject of writing in LaTeX.

    To start, I use the online tool Overleaf to work in LaTeX, but there are other options such as TeX maker to start your LaTeX journey. My personal preference is Overleaf, but TeX maker may be helpful if you often find yourself without internet connection and still needing to edit your .tex files. 

    When creating a new project, I try to keep in mind what my purpose for the document is, and if I need a specific template (either offered through Overleaf or some I have made on my own). Often, I just make a copy of the template I have made for homeworks and continue editing it to the specifications of the class I am using it for. Othertimes, I’ve used some of the resume templates to try my hand at that. Of course, each project is different, so its good to experiment on your own with different possibilities!

    In all projects, there exists the title and metadata, where I can note that I am the author, list co-authors, the date, and more, all contained within the preamble section. The preamble section is where the outline of the formatting is, and a bank for all the tools you may need as you go. One of the most useful parts of the preamble is the selection of packages you include, as it widens your ability in what you’re able to accomplish in the document. For example, if you would like to show images, there’s a package called graphicx to help neatly organize the image onto the document and minimize the struggle of neatly fixing it in place. As a physics major, the packages I might use most often are: amsmath, amsfonts, amssymb, graphicx, physics, sinunitx, mathtools, verbatim, and more. You may find some other helpful packages for your own use! Moreover, the preamble is where it is stated what class the document falls under – such as article, report, book, and so many more options with even more available modifications.

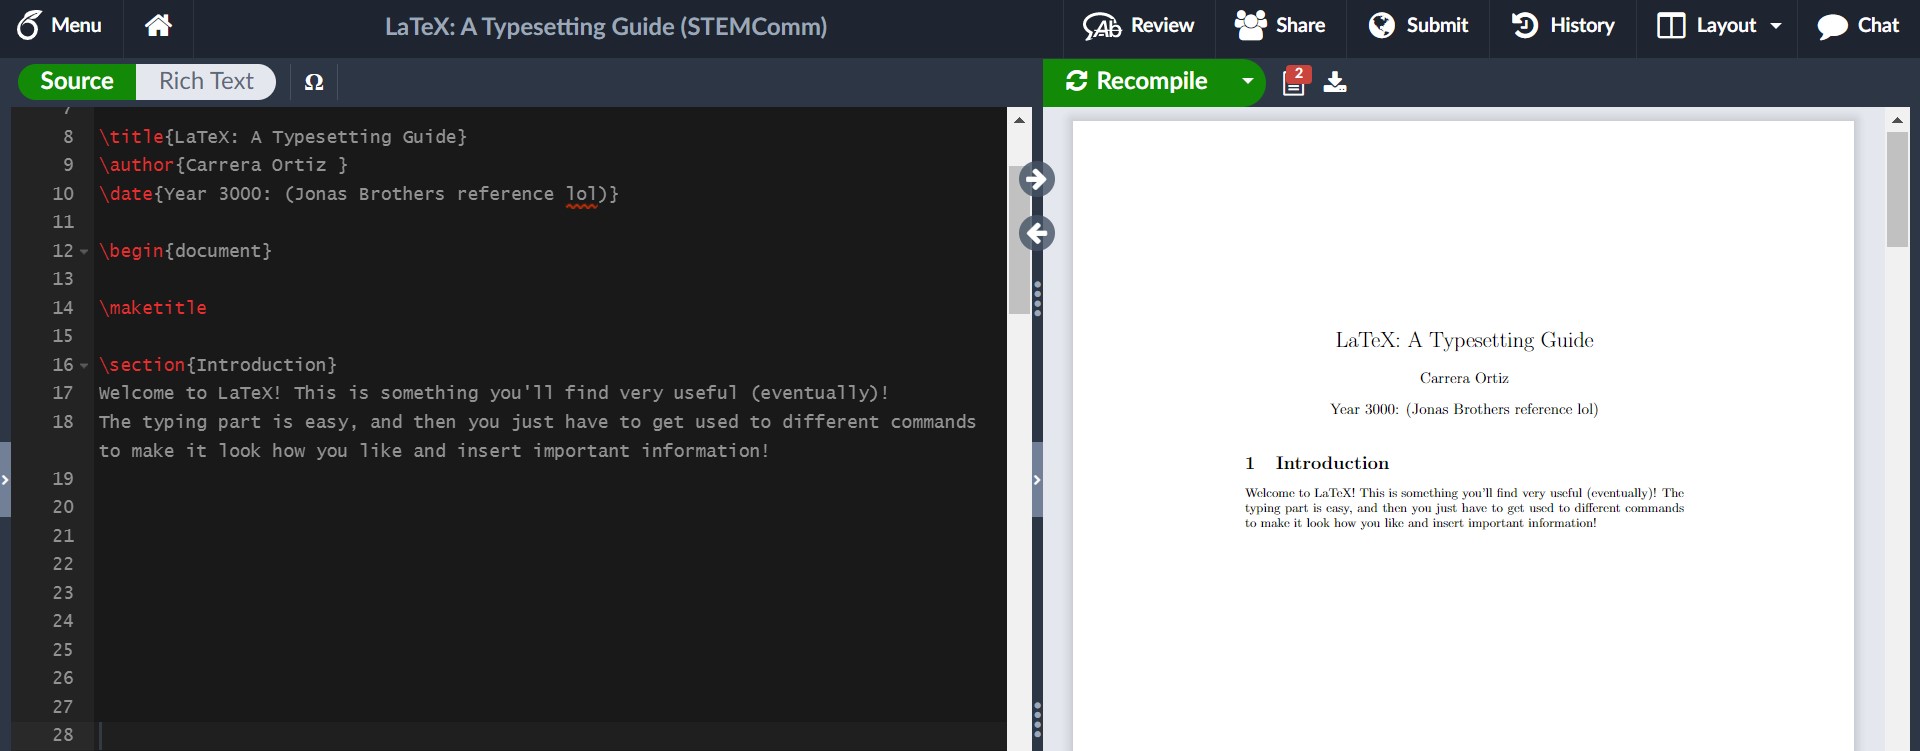
    Then, the document begins. Literally. The first environment, typically indicated with the “\begin{ }” (and “\end{ }”) command,  is introduced immediately after the preamble, as the document is its own environment. Whatever is typed outside of the environment will not directly be reflected onto the pdf version (unless it is formatting stated in the preamble). If I were to re-create this article in LaTeX, the first thing I would do in the document environment would be to use the command “\maketitle” so that it could take the title from the preamble and format it neatly. I could also make a section called the Introduction to let you know what the paper was all about! Sections are helpful to organize the document to make it easier on the reader, and can especially be helpful for lab reports. To create sections, you’d use the “\section{}” command, where you’d put your section title in the argument of the command. For example, let’s make an Introduction:

    And without touching any fonts, bold, or anything like that, we have the start of a LaTeX article!!!

    Before continuing on, allow me to clear up some basic syntax of LaTeX. As we’ve seen with the “\section{}” command, we have arguments (args) that are usually represented with curly braces: {}, and in some cases extra parameters are in straight braces: []. One common example is “\usepackage[utf8]{inputenc}”, where this (as far as I know) is a basic formatting setting. With the section command, we inputted “Introduction” to the argument so that we could name the section. Additionally, like most programming languages, there is a way to put comments in the coding portion of LaTeX that doesn’t show up in the pdf version. This is very helpful to explain new commands you’ve created or directions for a template. The comment is indicated with “%”. Anything typed after this on a line will not show up until you go onto a new line. If you would like to manually create a vertical spacing delimiter (in other words, a new line), you can use “\\”. This is not indented for the next paragraphs you may start. For horizontal spacing delimiters (simlar to the tab key) you can use “&”, which you will most commonly see in creating tables. These are the most likely syntax related things you will come across (other than the escape key)!

    As helpful and streamlined as this all is, many people may still prefer to use Word or Google Docs over this. So why use LaTeX? Two words. Math mode. It’s important to note that math mode has its own syntax, but it isn’t too much more! In STEM, math mode is extremely helpful because it allows you to easily format and include equations and other mathematical work.

    Some common environments in math mode include equation, gather, and align. Gather and align can help a lot more when there are multiple relevant pieces of mathematical information at once so they can be formatted well. The equation environment is helpful for textbook-style math where you can choose to number each one or not!

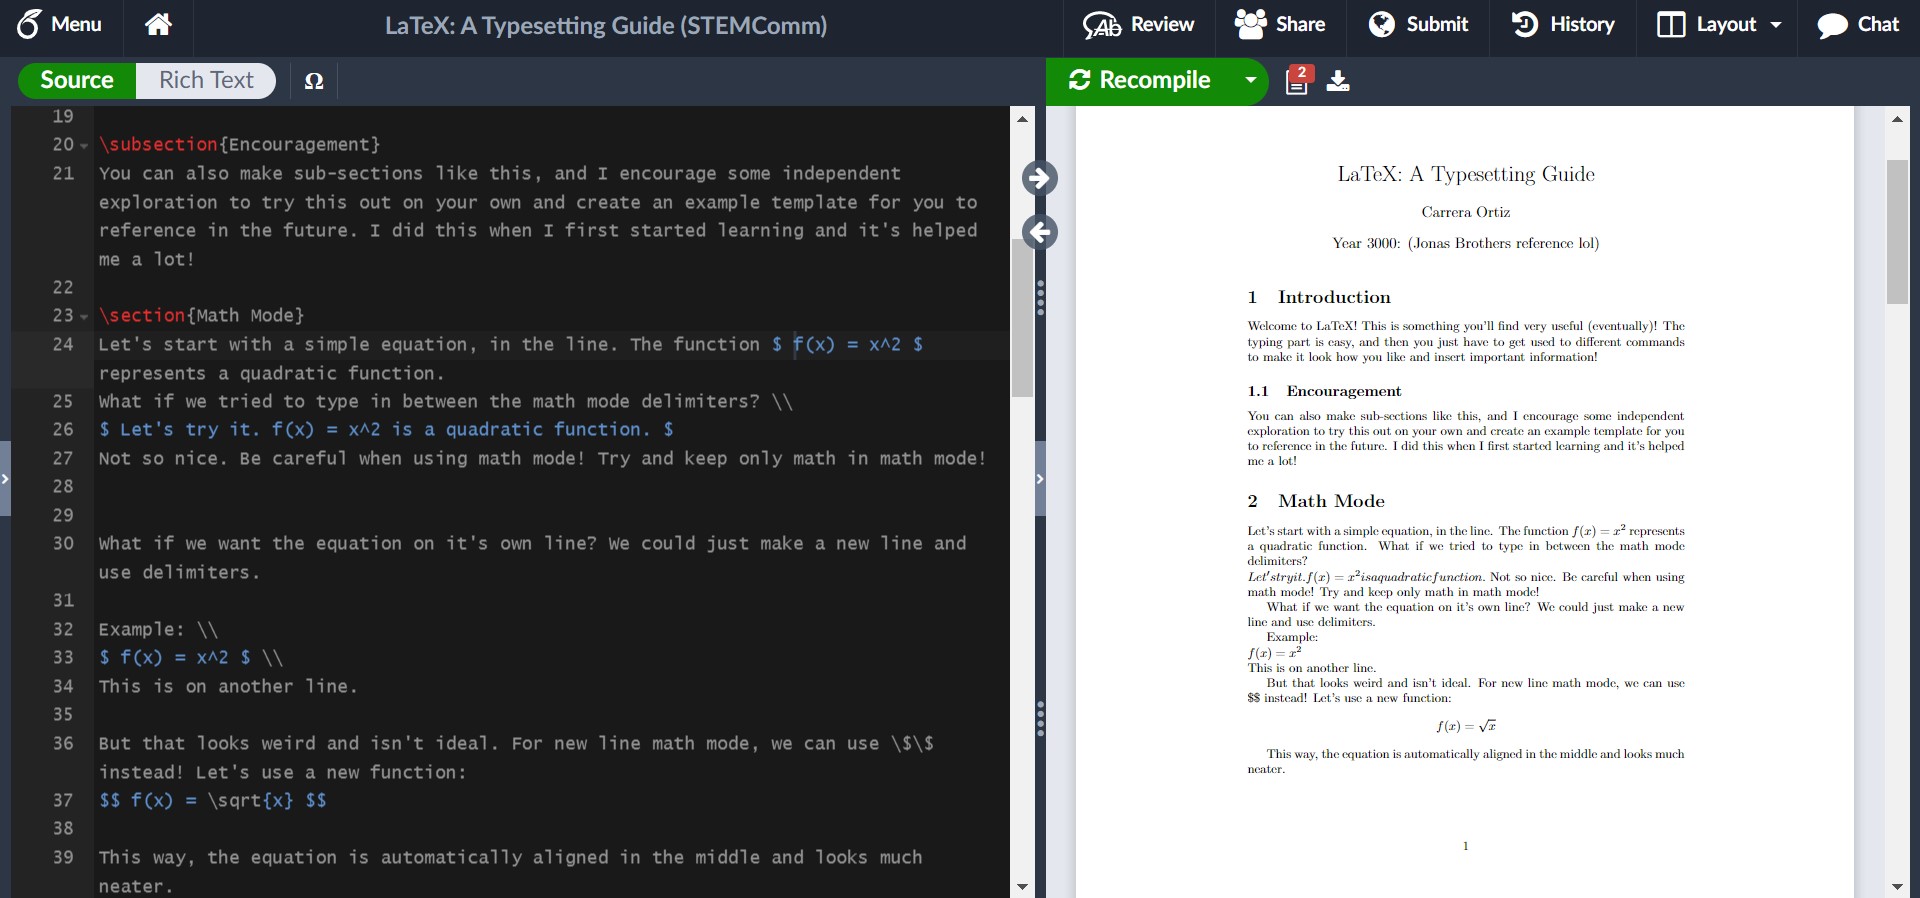
    Something else in math mode that is common, be it for a homework problem or simple discussion of the math, is using in-line math. This is where you don’t isolate the equation from the paragraphs, but simply keep it in-line with the words so that it’s all one neat paragraph. Let’s try it!
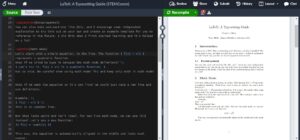
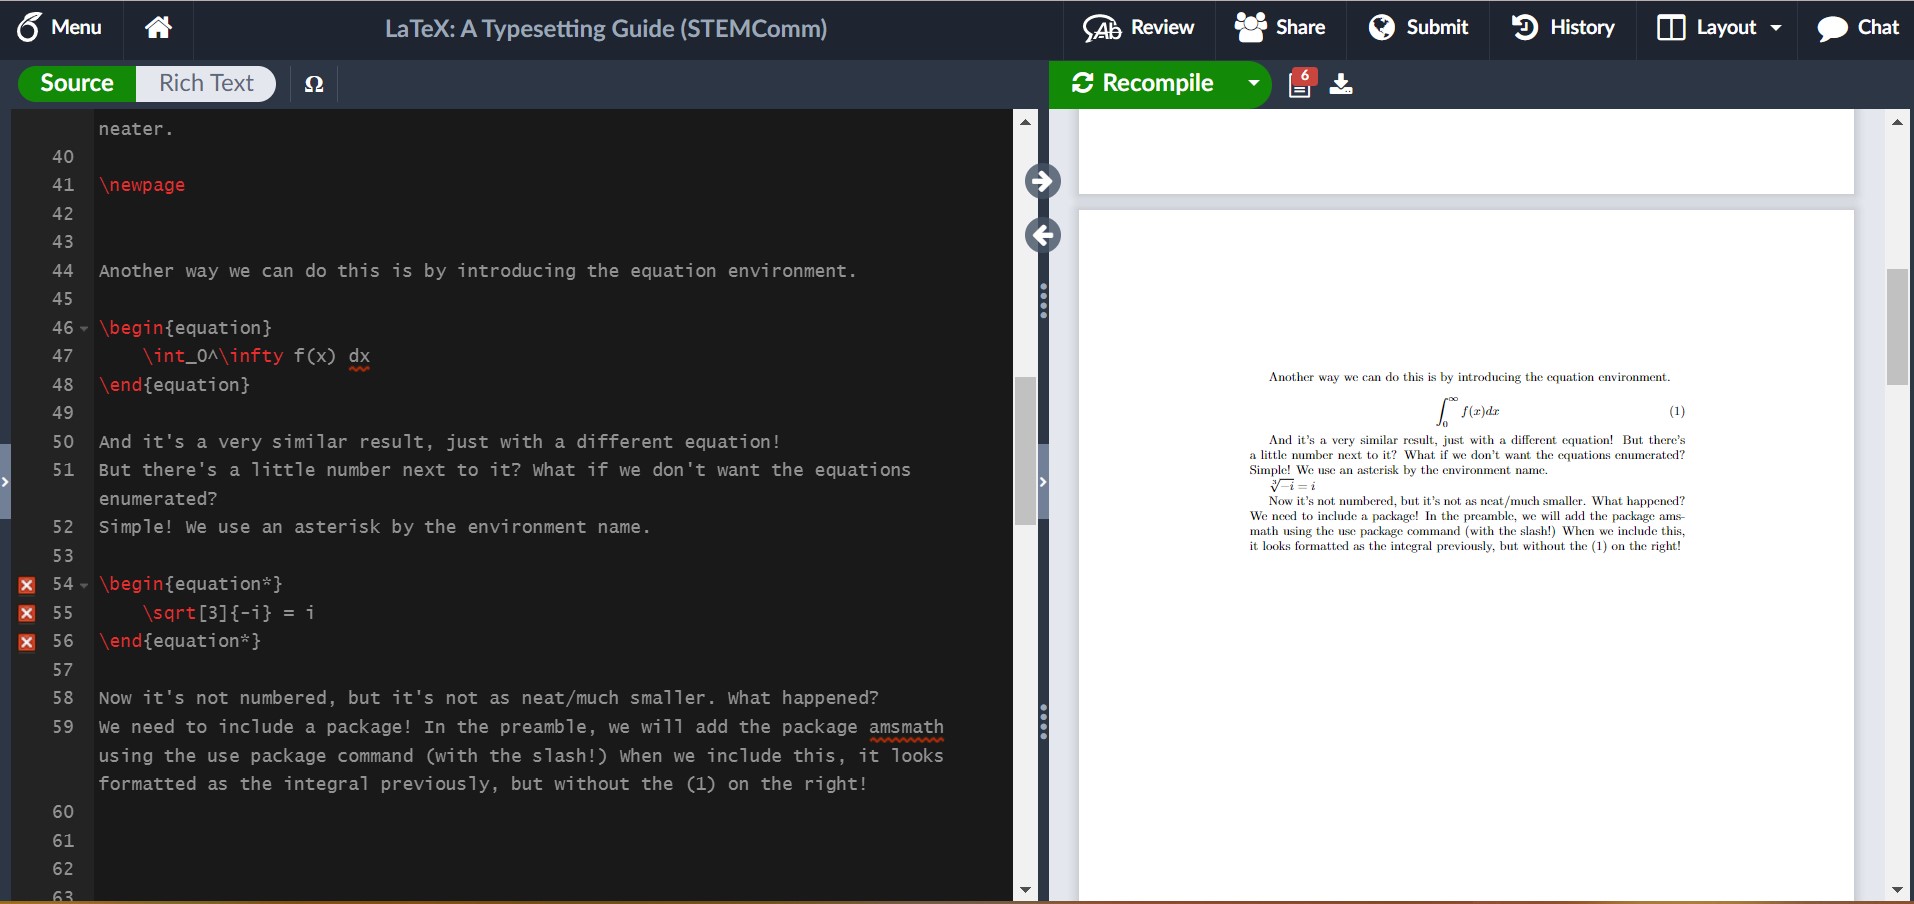
    This example shows the syntax for in-line math mode and newline math mode. For in-line math, the math is wrapped around single dollar signs on either side, such as how we had $ f(x) = x^2 $. The newline math, which is good for exemplifying results, work, or important equations that will be referenced later (something the equation environment makes easy), is wrapped around double dollar signs. In this example, we had $$ f(x) = \sqrt(x) $$.

    I hinted that the equation environment is numbered (like you’d expect to see in a textbook), but you can opt-out of this! Let’s see what this is like in LaTeX.
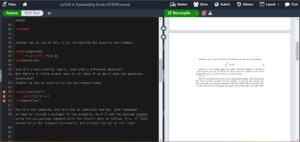
    In this example, I showed us running into an issue where we needed a package. It’s not always easy to tell what the solution is to an issue, but here, google is your friend and luckily it isn’t too hard to find! I encourage you in your own example of trying out LaTeX to include the package and see what it looks like fixed!

    For some common math symbols or uses, like exponents or square roots, it may be easy to just let it become muscle memory to do it, but for more complicated commands like for summations or limits, you can create a table for yourself to reference. (Hint: There’s luckily also another option I shall share if you wait a couple more paragraphs!)

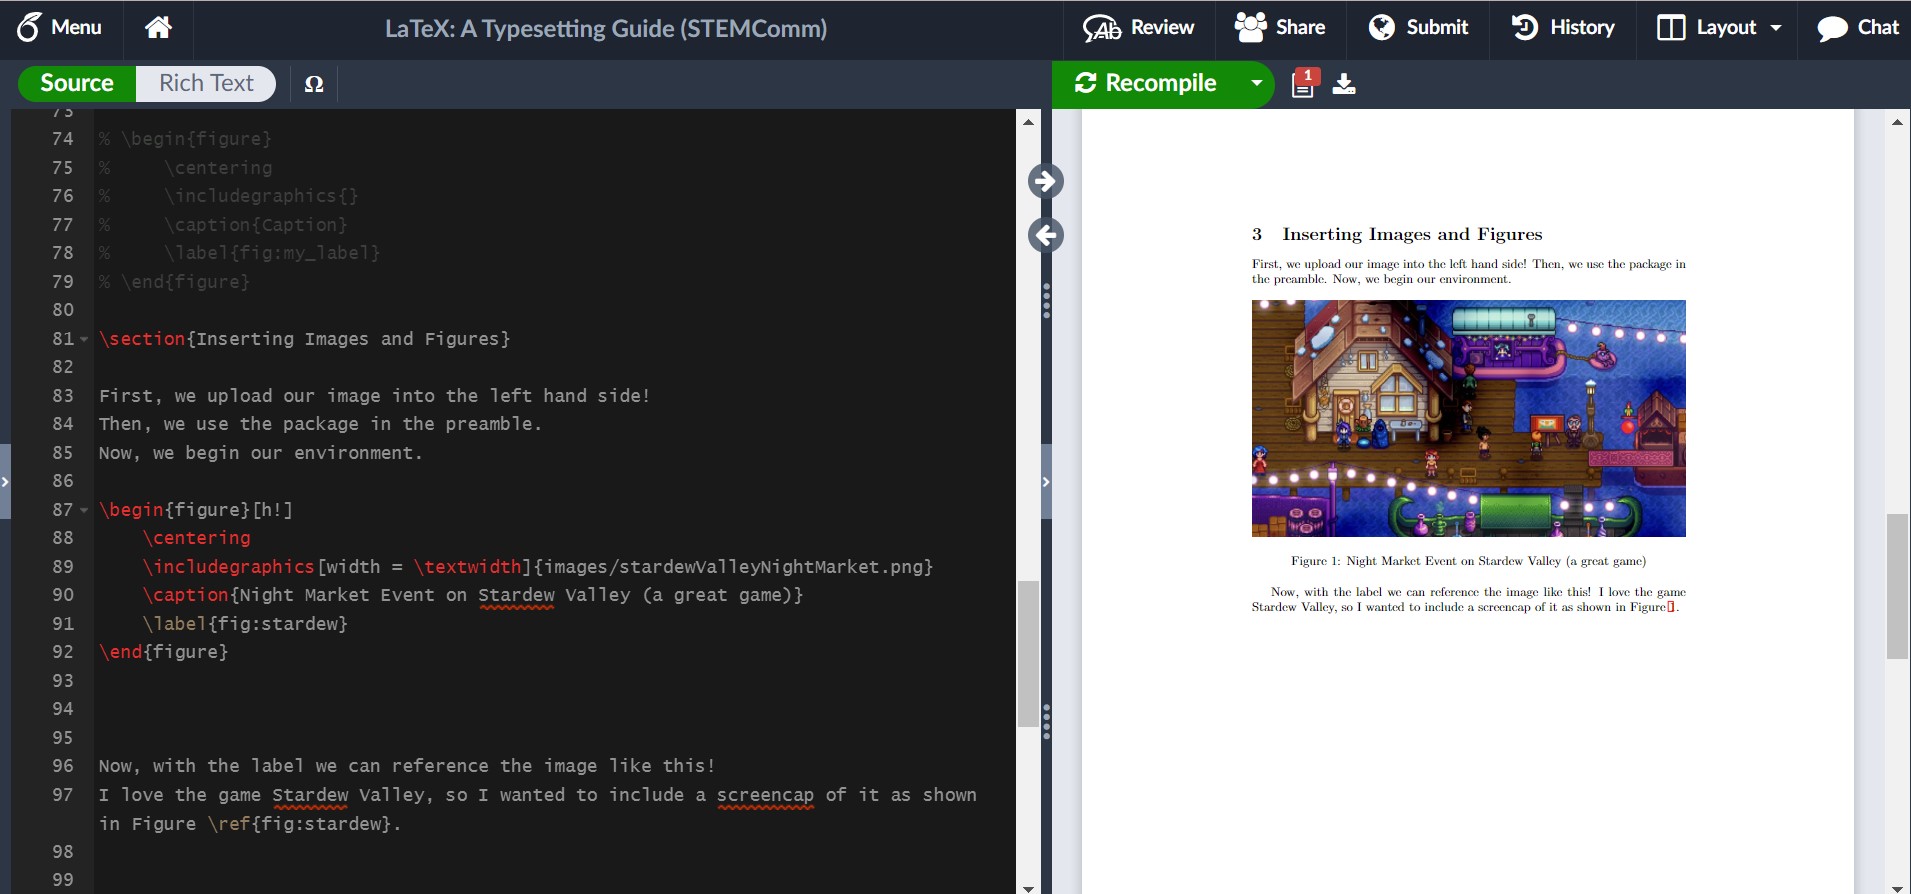
    Another thing you may want to include in your LaTeX abilities is including images, just as I have done in this article! It’s unfortunately not as intuitive as math mode, but Overleaf does a lot of the work for you still! Images are considered figures and are formatted through the figure environment. My general suggestion is in the file outline to create a folder for your images and upload them into there! To use the figure environment, you should insert a new package called graphicx into the preamble. By converting it to the figure environment, you’re given more control over where it is and the dimensions of your image, as well as some ability to caption and reference it. If you’re uninterested in the extra help, you can simply use “\includegraphics{yourImage}”.

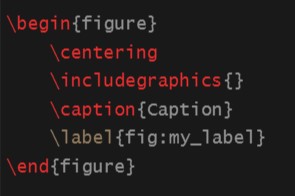
    To use the figure environment, you can simply type \begin{figure} and press tab, then Overleaf should finish the basics of it for you. This should look like:
    Now, I will show you what it could look like with some editing in LaTeX!
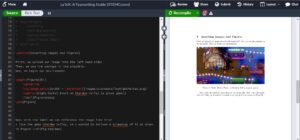
    As you can see, I included some specific edits to control how I wanted the image to look. I controlled the width, what reference I used to make it easy for myself, and where it was in the article. If you want an image on a page of its own, you can use [p!] instead of [h!] next to the begin figure environment command. Additionally, there are ways to have grids or side-by-side pictures, so its something to play around with more!

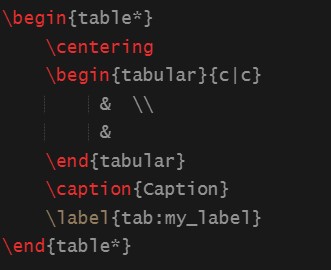
    Last instructions: Data Tables. Science is very reliant on data, so it makes sense that a lot of people interested in STEM might want to know how to include data tables in LaTeX. Expectedly, data tables have their own environment. The basics look like this:
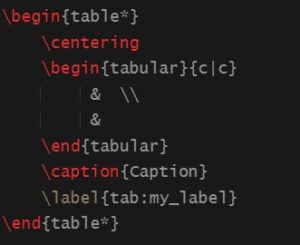
    There are some recogizable things, like the centering command and the caption and label. These work just the same as the figure environment. The tabular environment within is noticably different. The columns of the table are controlled by the {c | c} arguments. If you would like more or less columns, you can alter the amount of c’s (but be sure to include the ‘|’ delimiters). The table is actually all written in the blank area with the ampersands and new line delimiters, which you may have recognized in my previous notes on syntax. Here, you may have something like:

    Column 1 Title & Column 2 Title \\

    data row 1 col 1 & data row 1 col 2 \\

    data row 2 cold 1 & data row 2 col 2

    to showcase your data. I would experiment with this on your own! For example, you can look at the Pokedex and list some Pokemon and their types/health/attack and more to try it out! It gets a little tiring, but eventually I’ll share some nice resources to make this easier as well!

    Now, with some nice writing and composition skills, plus the ability to insert some familiar math into LaTeX, I would like to introduce some resources that will change the life of anyone who has not already figured this out. These few resources will absolutely help anyone using LaTeX to “work smarter, not harder”.

    For example, there are plenty of different symbols and functions that I might need for a paper, and it’s not always as intuitive as writing out the name of the greek symbol after the escape key (but luckily sometimes it is). This is where Detexify comes into play! There are other similar resources for equations, but I have enjoyed this one the most. Detexify allows me to draw the symbol I would like to include in my document, and not only will it show me the command for the symbol, but it will also tell me what package it belongs to and what mode it is used in. For example, if I want to indicate “there exists a real number x” symbolically, I could spend some time googling each specific thing and then write it down and hopefully remember in the future. However, through Detexify I can draw the symbols I need and find out that the symbol for a real number uses the command “\mathds{R}” in math mode through the package dsfont. I find this quicker and more helpful than just knowing the relevant command to use, and a little better than referencing a table every time! You can find this website at https://detexify.kirelabs.org/classify.html.

    Additionally, data can become very length-y very quickly and make creating data tables excrutiating. Even some small tables can take a while to set up through LaTeX without a quick way to do it. However, there’s actually a convenient website where you can set up a table for any data you would like to show in a quick and easy manner (as you might in MS Word or another similar processor), then it produces the LaTeX code that corresponds with what you’ve entered. I only wish that I had found this when I was actually taking my Advanced Lab I course and didn’t spend an hour just filling in data I had written on paper into the document. You can find this website at https://www.tablesgenerator.com/.

    Also, there is indeed a LaTeX wiki for any other things you may want to look at (including a section that goes in more detail on images).

    The irony is not lost on me that this article sharing my LaTeX knowledge is not written in LaTeX. However, when I first learned to use it, I wrote everything out in my own personal article where I experimented with all of these things and more. It was also extremely useful for me to look back on in case there was anything I knew I had done before and just needed a quick reference on how I did it and what the result looked like. I strongly encourage everyone to practice in their own article and learn something new! Maybe, after reading this article, you’ll find you also want to share some fun tidbits of information in the neatest and best way possible: LaTeX!


  • Plant-Based Savoriness: Easy as 1-2-3, MSG

    Plant-Based Savoriness: Easy as 1-2-3, MSG


    As a fourth year college student, I’ve spent a good amount of time cooking for myself and experimented with a lot of different cuisines ranging from Italian to Southeast Asian-inspired dishes. Within all of that, I’ve also tried to transition towards a more plant-based diet. Along with getting some more veggies in my meals, eating less meat can also help reduce your carbon footprint since a lot of poultry and beef farming can consume a lot of water as well as contributing to deforestation and the emission of greenhouse gasses. There’s a lot of other benefits to eating less meat, but as we all know, it definitely is hard to make that transition. The hardest part? The taste. Many of the plant-based options for meals involve replacing meat in a dish with some other protein like tofu. Although this is a great idea, tofu itself has no taste since it’s literally just processed soybeans. The solution to this issue may come from looking at our taste buds themselves. 

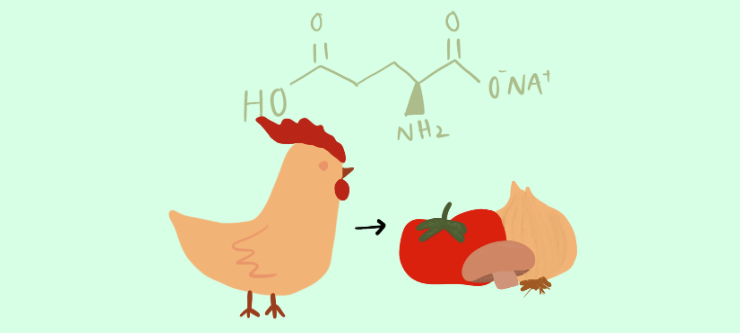
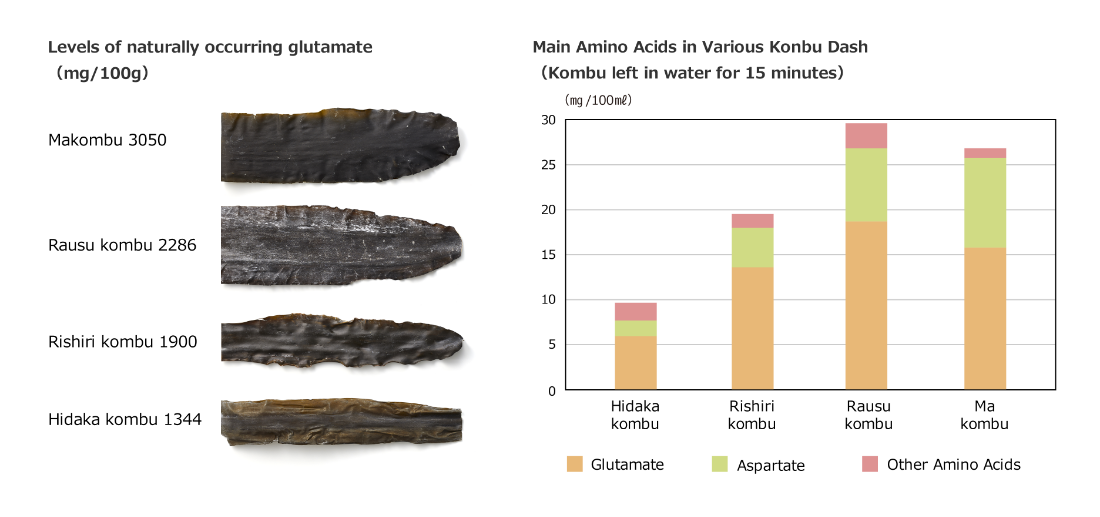
    Although the number of ‘tastes’ our tongues can perceive has been contested over the years, the most important one for our problem is umami. Umami is a flavor that Japanese researcher Kikunae Ikeda found in a type of seaweed called ‘kombu.’ He concluded that this taste was a result of the salts of glutamic acid, which is also found in meats. Glutamic acid also includes monosodium glutamate or MSG (which has no conclusive evidence proving that it’s toxic btw). Glutamates (which are the proteins made up of glutamic acid) act very similar to table salt, but instead, it enhances how our tongues perceive salt while salt brings out the flavor in our food.

    https://www.umamiinfo.com/

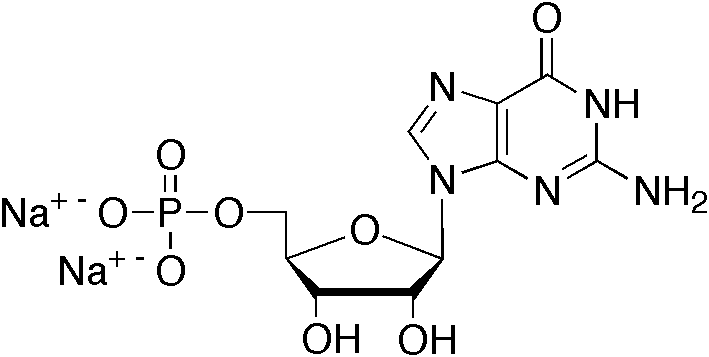
    Other chemical compounds that contribute to savoriness include the proteins inosinate (which are exclusively in meats and fish) and guanylate (which can be found in plants). This savoriness is very subtle, but its presence is still crucial to the flavor of food, just as salt makes food seem more flavorful. What foods have these compounds and are also plant-based?

    Disodium guanylate (wikepedia.com)

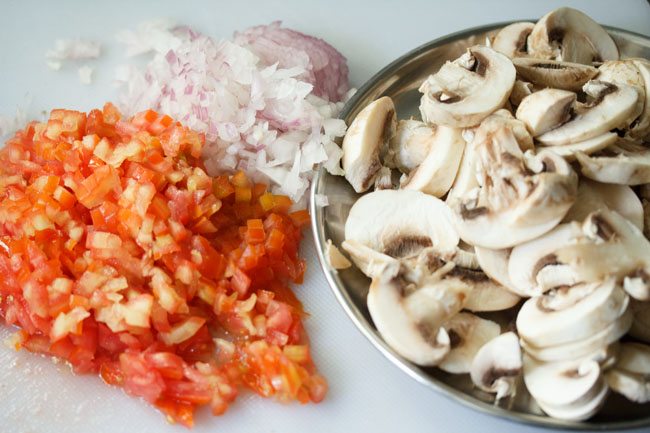
    As a person of a South Indian background, I was raised with a mostly vegan diet. Of course, I enjoy a good beef roast and chicken curry, but my favorites are the veggie dishes that my mom made since they were just as savory as the meat ones. One thing I noticed was the presence of tomatoes and onions in most of these dishes. Tomatoes (as well as mushrooms) have a high concentration of glutamate, and as we previously discussed, this contributes to the umami flavor we perceive. Onions, however, derive their flavor from sulphuric compounds– which also make us cry. When we chop onions, we break up those compounds, which are further broken down while cooking and releases more of the onion flavor and brings out its sweetness. If you’re in a pinch and can’t find a space to add these vegetables into your dish, you can also try adding MSG.

    https://www.vegrecipesofindia.com/

    Of course, switching over to a fully plant-based diet is difficult and you should take it step-by-step. Just remember that achieving savoriness from your veggies doesn’t have to be complicated and can be as easy as 1-2-3…

    Resources:

    Berry, Donna. “The Science of Savory.” Food Business News RSS, Food Business News, 11 Apr. 2016, https://www.foodbusinessnews.net/articles/6480-the-science-of-savory.

    Lang, Ariane. “Is MSG Truly Unhealthy? All You Need to Know.” Healthline, Healthline Media, 15 Nov. 2021, https://www.healthline.com/nutrition/msg-good-or-bad#what-the-research-says.

    Lisa. “Savory vs. Sweet Onions & What Makes a Great Salad.” The Cultured Cook RSS, https://theculturedcook.com/2015/09/savory-vs-sweet-onions-an-easy-crispy-salad/.

    Loria, Joe. “How Eating Less Meat Can Save the Planet.” World Animal Protection, 15 Apr. 2021, https://www.worldanimalprotection.us/blogs/how-eating-less-meat-can-save-planet.

    Nunez, Kirsten. “Types of Taste: What to Know about Taste and Flavor.” Healthline, Healthline Media, 15 May 2020, https://www.healthline.com/health/types-of-taste#umami-taste. 

  • The Science of Baking Pt.2

    The Science of Baking Pt.2

    Introduction

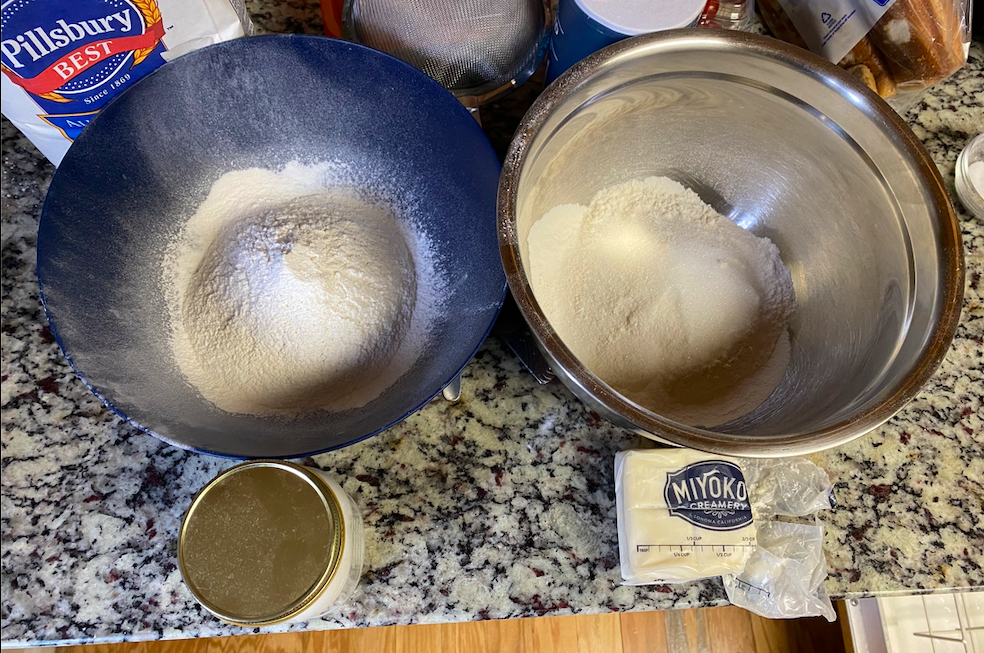
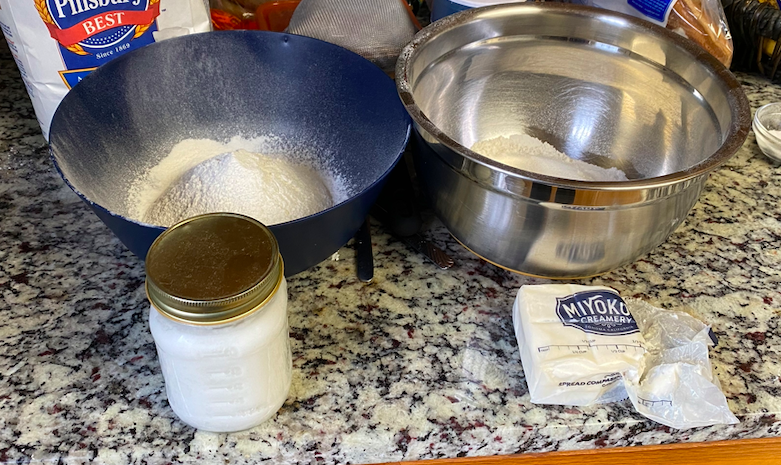
    Welcome to Part 2 of The Science of Baking! Since this is the second installment of the series, I would recommend going back and reading part 1. This article will go through an experiment of baking a flaky pastry using two different types of fat: butter and coconut oil. There are accompanying pictures that I took myself showing in detail the two pastry doughs!
    Step 1: Mix flour, salt, and sugar.

    The two bowls of flour mix for each fat.
    The two bowls of the flour mix and the corresponding fats in front of them.

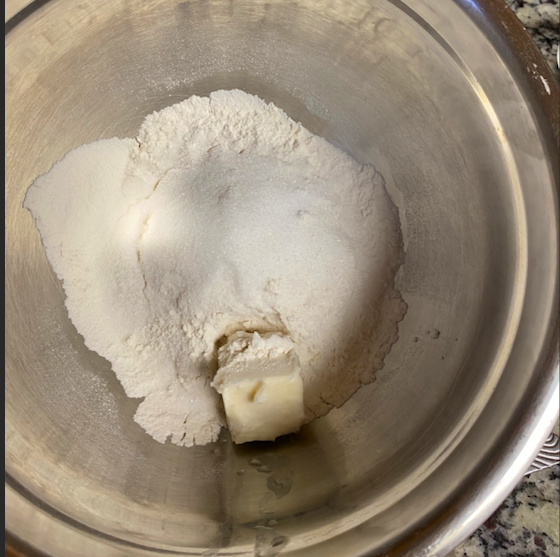
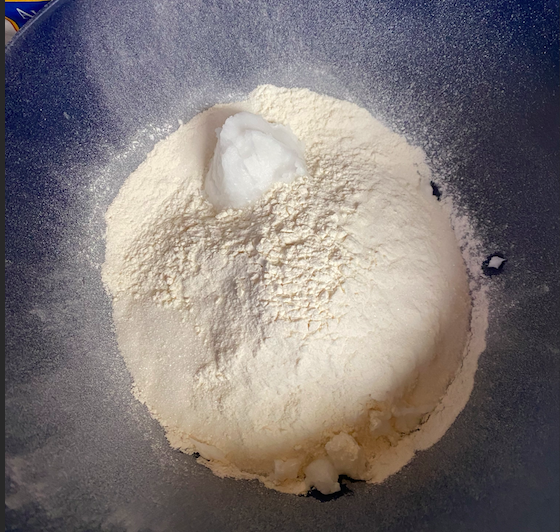
    Step 2: Break the fat up into 4 equal portions and add one portion of the fat component to flour mix.

    The butter + flour mix
    Coconut oil + flour


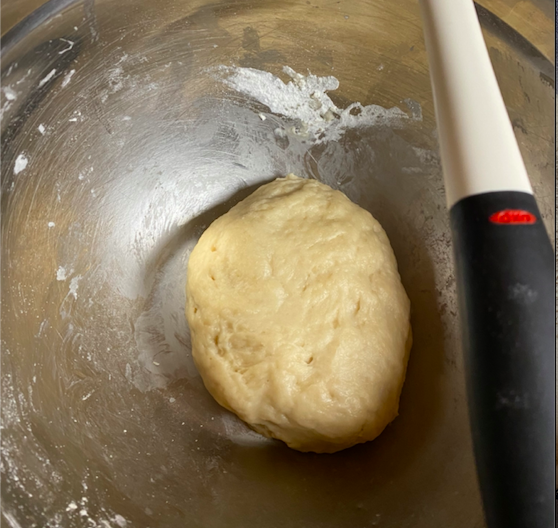
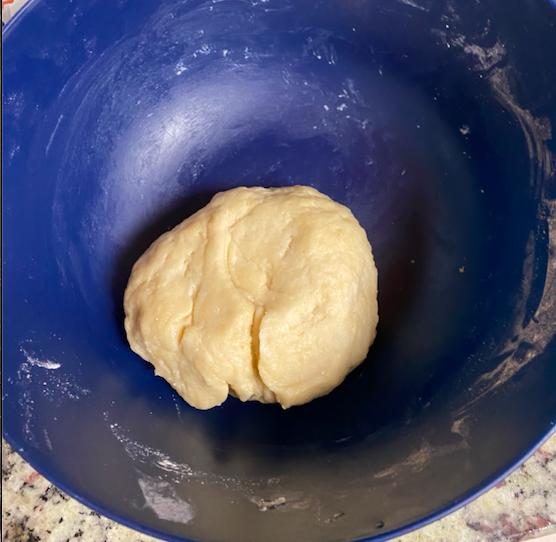
    Step 3: Mix and add water slowly until a dough forms.

    Dough with butter
    Dough with coconut oil

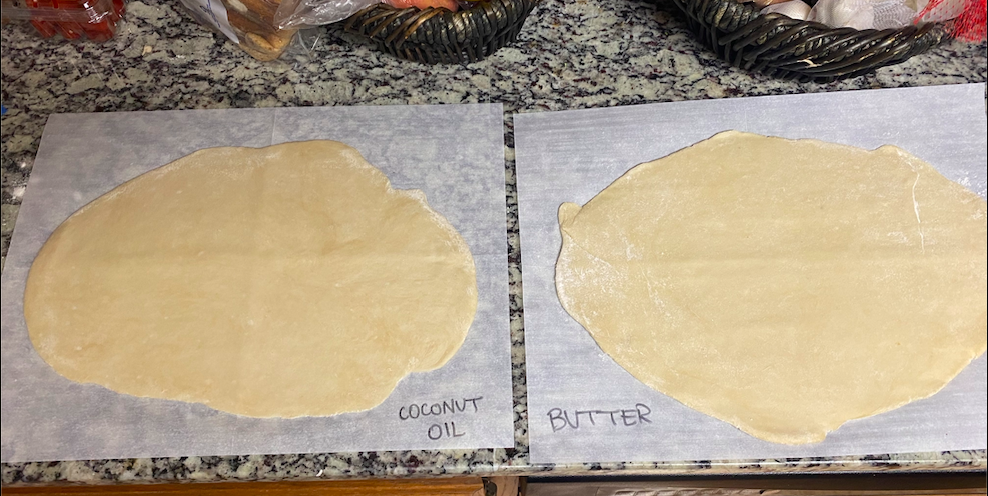
    Step 4: Roll out dough into flat sheet

    The doughs rolled out into rectangles

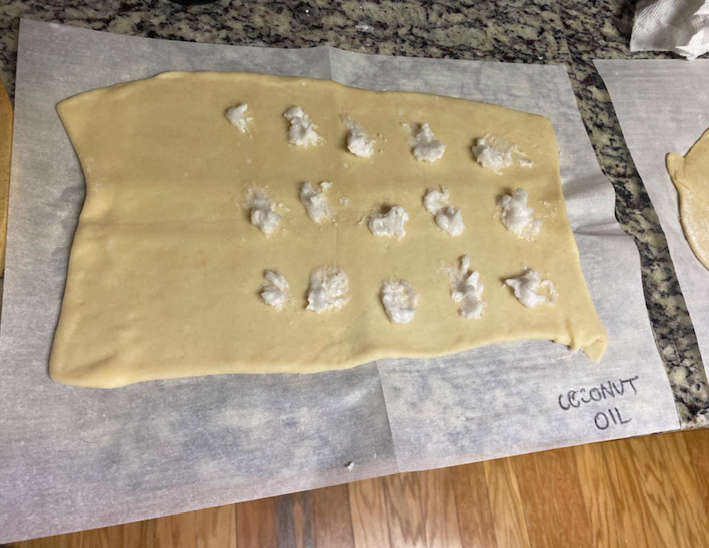
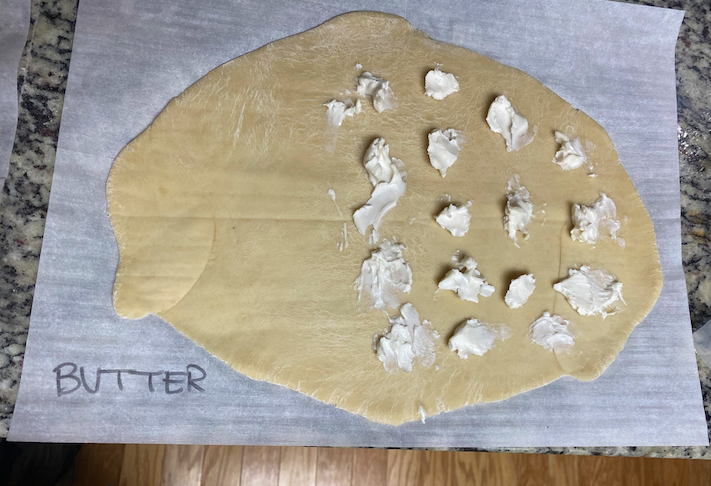
    Step 5: Break up the next portion of fat and spread along sheet of dough

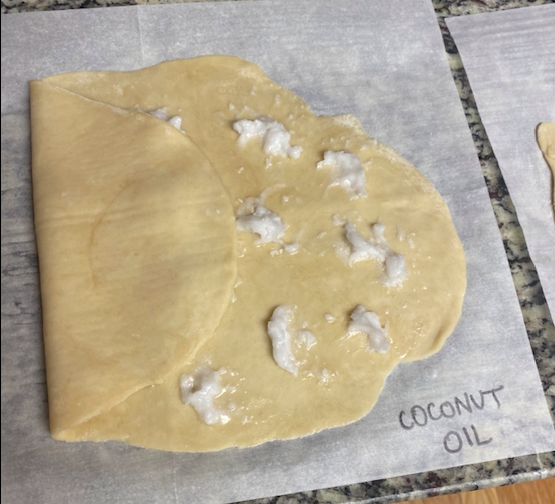
    One portion coconut oil dotted on dough
    Butter dotted on dough


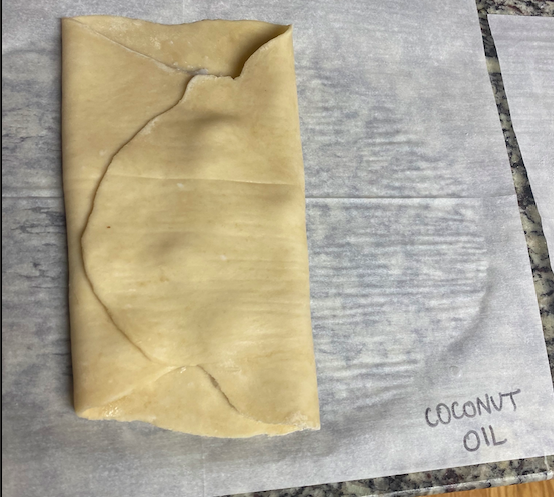
    Step 6: Fold the end without fat over 1/3 of sheet and fold the other end over the top.

    First fold
    Second and last fold

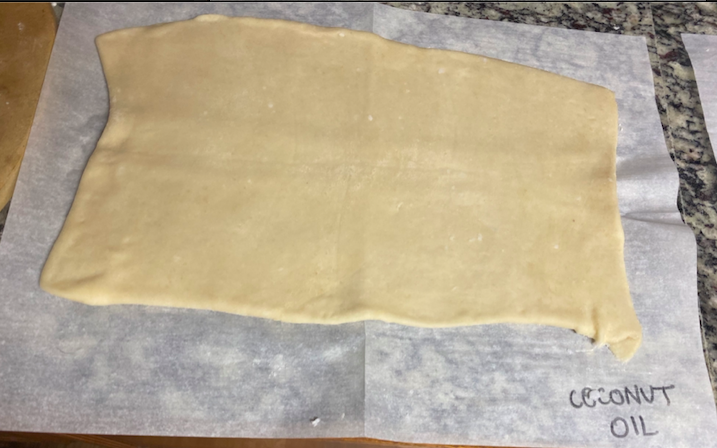
    Step 7: Roll out the dough exactly like in Step 4 carefully.

    Rolled out dough for second time

    Step 8: Repeat steps 5-7 two more times with the next two portions of fat.

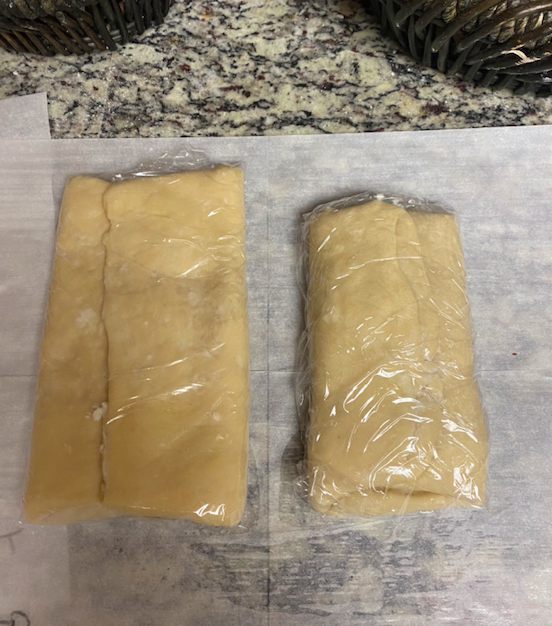
    Step 9: Wrap the dough in plastic wrap and chill in fridge for 30 minutes.

    Wrapped up and ready to go into the oven!

    Step 10: Preheat oven to 450° F and bake pastry for 8-10 minutes. 

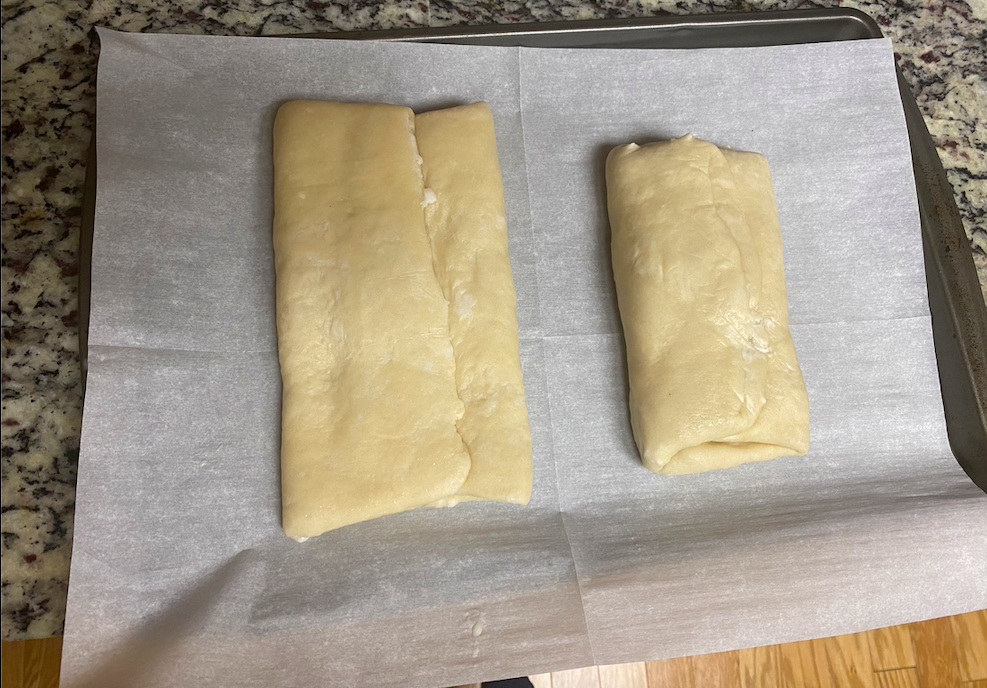
    Before baking…
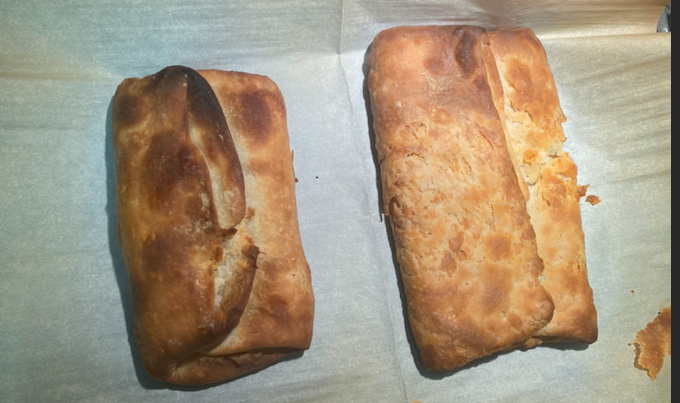
    Crispy, baked flaky pastry fresh out of the oven!


    Observations

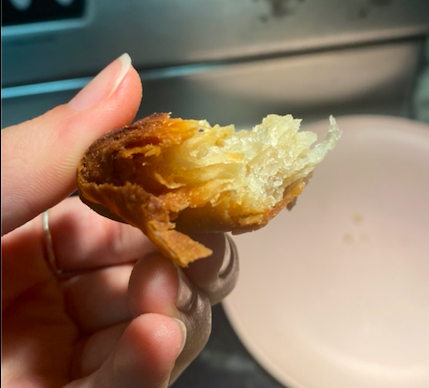
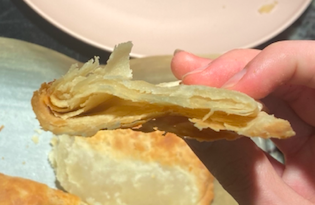
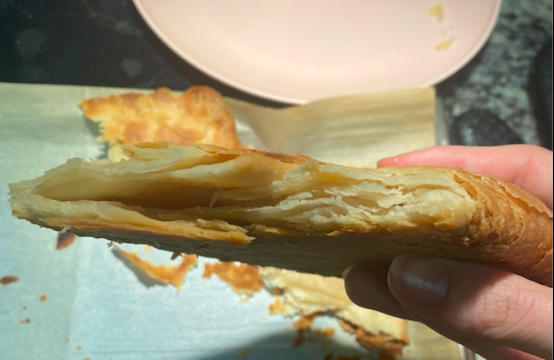
    There were many, many differences between the butter pastry and the coconut oil pastry not only during the preparation, but after baking as well. Although coconut oil and butter have very similar structure at first glance, the butter was much creamier and incorporated into the flaky pastry dough much easier than the coconut oil. The oil melted super quickly, making it difficult to keep very doughy as it was getting way too wet. The coconut oil was also much harder to de-clump while the butter of course, had real clumps. Another huge difference between the doughs was their size. As seen from the photos, the coconut oil dough had a much larger size than the butter dough. My theory for this stark difference was that the butter was much thicker than the coconut oil, making the dough much more cohesive and elastic. The coconut oil pastry was clearer flatter and more spread out, due to the silky nature of the coconut oil. The butter pastry was also much taller than the flat coconut oil version; my thinking tells me the butter allowed for the pastry to rise better than the oil did.

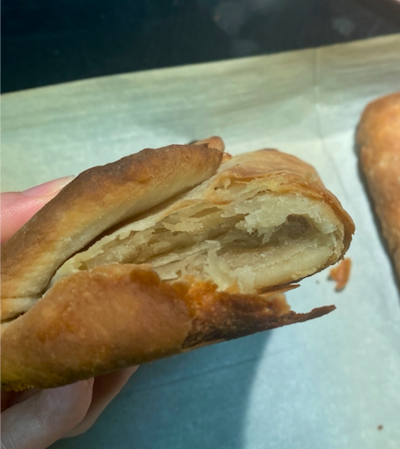
    In terms of taste, texture, and overall flakiness, both doughs performed relatively well but the butter dough definitely outshone the coconut oil. Though the butter dough was better in taste and more compact, the coconut oil pastry was also quite delicious as a substitute for butter. For any coconut lover, this is the perfect pastry substitution for fat. All in all, both doughs baked into beautiful flaky pastries with multiple light layers of crisp pastry, but the dough using the butter cooked better and tasted more like a pastry would normally taste.

    The dough with butter and its nice flaky layers
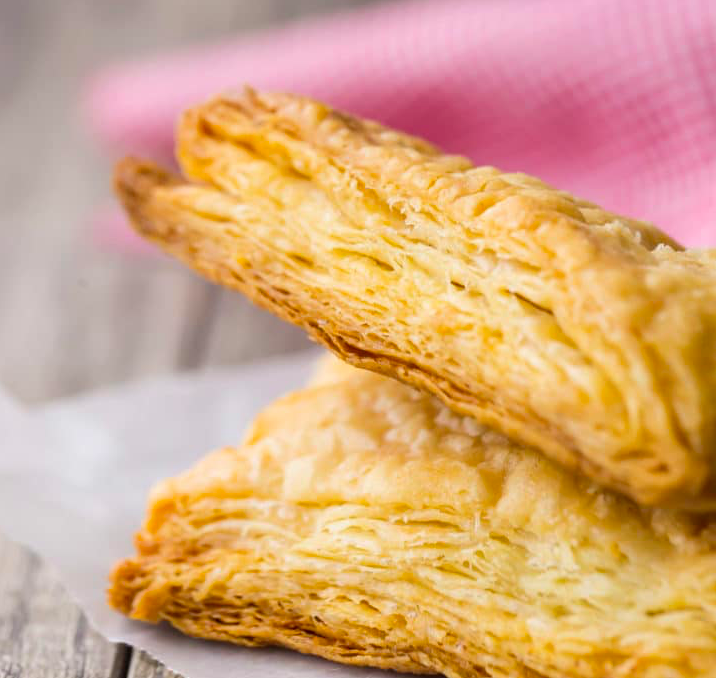
    Buttery, flaky layers of delicious pastry


    The flatter layers of the coconut oil pastry
    The coconut oil flaky pastry result


    Conclusion

    This experiment was so much fun to do considering I love to bake and have never made a flaky pastry dough before! I learned so much from the experience- not just how to make a flaky pastry but also so much new insight on how the science of baking really works together to create a magnificent dessert when heat is introduced to a couple of different ingredients. I encourage anyone reading this post who enjoys baking to try this experiment out for yourself to see if your results are the same! Not only did this experiment make me want to bake even more, but now I have an urge to try this recipe with all possible substitutes for fat like ghee, vegetable shortening, even lard. The possibilities are endless and we are just getting started!

  • Color Changing Lemonade

    Color Changing Lemonade

    Would you believe the drink above is lemonade, and the blue and purple colors are due to all natural ingredients? That’s right. The lemonade pictured is cooled with not-so-average ice cubes. These cubes are made from frozen butterfly pea flower tea. 

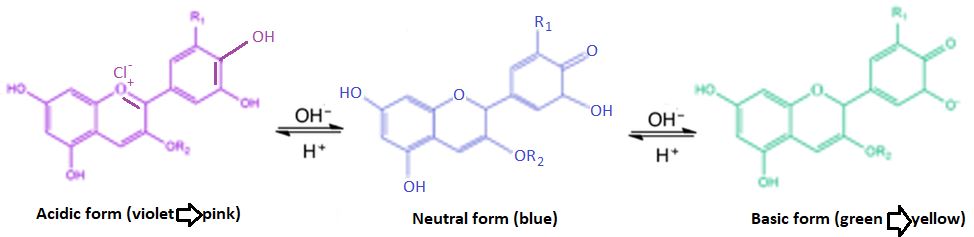
    Butterfly Pea flower tea is a popular non-caffeinated tea from Southeast Asia. It is made simply by steeping butterfly pea flowers in boiling water. Butterfly pea flowers get their deep blue hue from a natural compound called anthocyanin. This compound is the reason for the dark blue color of the ice cubes in the video above, and is also the reason for the amazing color change that occurs when the ice cubes come in contact with the acid from the lemon juice.

    Anthocyanin undergoes reversible chemical changes (shown above) when exposed to either acids or bases. The chemical change alters the chemical structure, which alters the way it absorbs different wavelengths of light. When anthocyanin is exposed to a base, it reflects green and then yellow, depending on the strength of the base. When anthocyanin is exposed to acid, it turns purple and then red, depending on the strength of the acid. Because lemons are acidic, the melted butterfly tea ice cubes turn purple!

    You can make this cool color changing drink at home with butterfly pea flowers and other normal household ingredients.

    Making the butterfly pea flower ice cubes is simple. Just steep about 4 to 5 butterfly pea flower tea bags, or 25 to 30 dried pea flowers, in about 2.5 cups of boiling water. You can choose to leave the teabags/flowers steeping for up to 30 minutes for concentrated color, but just 10 minutes will get you blue ice cubes that can definitely give you a beautiful color change.

    All that’s left is to make the lemon mix that will turn the ice cubes purple! Mix 1 cup of lemon juice with ¾ cups of sugar and stir until the sugar is completely dissolved. You can heat up the mixture a little to speed the mixing process.

    Next, take your frozen butterfly pea flower tea and put it in the blender or food processor to create shaved ice. If your blender is like mine and can only make crushed ice pieces, that’s okay, just make sure there is some melted tea in your glass to get the immediate color change effect. Fill your glass halfway with crushed or shaved butterfly pea flower ice, and then add the lemon mix! As the anthocyanin comes in contact with the acid from the lemon juice, it will turn a pretty purple color. If you have some bigger crushed butterfly pea flower ice pieces, they will stay blue and only turn purple as they melt, which will create a swirly blue/purple gradient effect. Fill the glass with your desired amount of lemon mix (I fill it about ⅓ full) and top the rest of the glass with club soda! And viola, you have your color changing lemonade!

    Citations

    Kodippili, D. (2020). Color Changing Lemonade Slushie (Galaxy Lemonade). The Flavor Bender. www.theflavorbender.com/galaxy-color-changing-lemonade-slushie/

    Kan, Viirj & Vargo, Emma & Machover, Noa & Ishii, Hiroshi & Pan, Serena & Chen, Weixuan & Kakehi, Yasuaki. (2016). Organic Primitives: Synthesis and Design of pH-Reactive Materials using Molecular I/O for Sensing, Actuation, and Interaction.